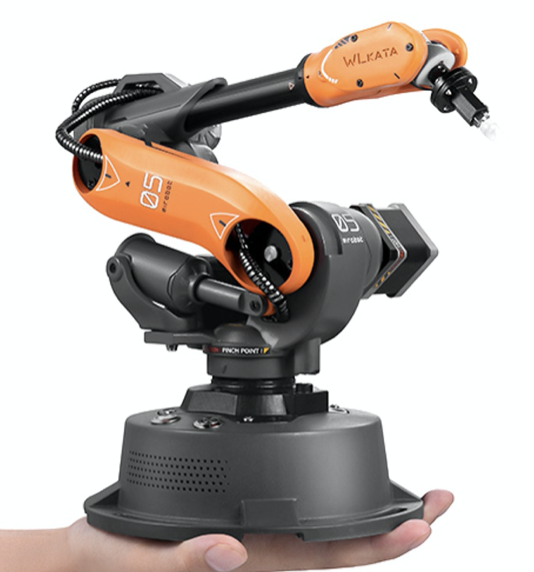
PROJECT: Remotely Control Arduino Robot Arm Using IMU Sensor over Bluetooth
The blog post on TechnologyX2 details a project for remotely controlling a 4DOF (Four Degrees of Freedom) Arduino robot arm using hand gestures. The control is achieved through an Inertial Measurement Unit (IMU) sensor which captures the hand's motion in x, y, z axes and transmits the movements to the robot arm over Bluetooth. Key components include a Lafvin Arduino Nano clone, HiLetgo HC-05 Bluetooth Master Module, HC-06 Bluetooth Slave Module, and a GY-521 MPU6050 3-Axis Accelerometer Gyro Module. The project emphasizes the importance of problem-solving in engineering, and the author shares insights and troubleshooting tips based on their experience in configuring and testing these components. For more details, you can read the full article [here](https://www.technologyx2.com/blog_hightech/2021/5/23/project-remotely-control-arduino-robot-arm-using-imu-sensor-over-bluetooth).

So I got started with my next Arduino robotics project based on a cheap bluetooth module and IMU sensors. Also, to stay true to the spirit of the project, I used an Arduino Nano clone and all the cheap parts you can buy from the internet.
If you decide to follow my project, there is a strong chance the exact same parts will not be available and the alternate parts choose will lead you to a new set of problems. This I think is a very important thing to learn as an engineer. I always have to remind myself this too - The skill of an engineer is to be able to “Think” and “To Solve Problems”. Engineering is all about solving problems. Being able to anticipate the unknowns and/or unexpected problems and build it into your project is a key part to a successful project. This means, doing proper research ahead of time, learning from your & other people’s mistakes, estimate your timeline and cost knowing some parts will go bad and need to be re-built/re-purchased. Through out my career, I’ve seen (and responsible for) too many failed projects due to bad planing and estimation. After that, the “Persistence” to stick to the problem no matter how impossible it seems and how frustrating it gets.
Day 1 - 5/23/2021
The goal of the project is to be able to “remotely control the 4DOF Robot Arm using hand gestures”. The approach I am going to take is to leverage the Inertial Measurement Unit (IMU) sensor to read the x, y, z axis movement data of my hand and send the movement command to the Robot Arm over the bluetooth.
The parts I ordered from Amazon arrived and it was time to get started.
Lafvin Arduino Nano clone - Link
HiLetgo HC-05 Bluetooth Master Module (this module can be configure as both master or slave) - Link
HiLetgo HC-06 Bluetooth Slave Module (this is a slave only module that is exactly same a the one that came with my Lafvin 4DOF Robot Arm kit) - Link
HiLetgo GY-521 MPU6050 3-Axis Accelerometer Gyro Module - Link
As a part of the process of starting a project, I started by testing the parts. During this process, I will also identify any specific configuration and/or modification requirements for the parts. As expected, I started running into the issues.
I normally don’t like giving a specific answer to a problem as I believe the learning/understanding can only come from an engineer finding and solving the problem themselves. However, in some cases, the barrier to entry is just too high or difficult preventing a learner from getting started. I figure this is the time when a handholding is most needed.
There are many reasons why an electronics or software projects will not go right. In fact, this is the case for majority of the projects and an experienced engineers learned to deal with the frustration and calmly keep pushing forward. Here are some of the things to check if you are having issues with uploading your sketch (program code) to the Arduino Nano clone.
Try selecting Board as “Arduino Uno” instead of Arduino Nano and try uploading the sketch.
This was the problem I ran into and following was a quick workaround to continue testing the board. After uploading a sketch with “Board: Arduino Uno”, I changed it back to “Arduino Nano”, and selected “Processor: ATmega328P (Old Bootloader)” and uploaded the sketch again. This made it work for now, but I will have to update the bootloader later.
Update: bootloader updated using the instruction - https://www.arduino.cc/en/Tutorial/BuiltInExamples/ArduinoISP
USB Driver issue or wrong processor
Other common Arduino Nano clone problems
Planned Next Steps - Work In Progress
MPU 6050 - setup and reading data - Done
Bluetooth HC-05 Master setup & connection test - Done
Align MPU data to the robot arm movement & test drive - WIP
PROJECT: Arduino 4DOF Acrylic Mechanical Robot Arm Kit

Some times it gets really tiring working on an impossible high tech project based on a new ROS2 framework and many of the new ML modules that is constantly breaking. As such, it often is a good idea to come back to the basics to ensure your understanding of the basic skills are solid (or in my case, painfully realize all the gaps in my understanding). I decided to pickup an inexpensive beginner’s kit that includes all the components so I can build it quickly and feel like a winner.
In case you are interested, below is the link and some of my initial thoughts about the kit. (click the picture or link here)

LAFVIN 4DOF Acrylic Robot Mechanical Arm Claw Kit Compatible with Arduino IDE DIY Robot with CD Tutorial - $37.99 at Amazon when I purchased it.
There are many kits that are very similar, so make sure to check the user rating/feedback before choosing one.
The main reason for me choosing this kit was because it included the joystick control and the bluetooth support.
It was one of the best cost/value at the time in Amazon.
Here is the very quick review of the kit and the lessons learned
The kit comes with an Arduino Uno clone and a sensor expansion board. The sensor expansion board (blue color) mounts on top of the Arduino board (black color). Having a sensor expansion board made it easier to manage wires as you can just plug in the 4 servo cables and a bluetooth module. Many seasoned engineers disregard it as unnecessary, but I alway see beginners struggle trying to manage all the basic wiring especially when they have to trace wires and debug something later.
CD that was provided included a PDF manual, Bluetooth app for Android based devices, and example codes for the Arduino. Unlike many of the cheap electronic kits you buy on the internet with no instruction, I found the PDF manual very useful in putting together the robot arm. However, you will still need some skills in building such electronic kits and should already have basic understanding of operating Arduino unit. There are many Youtube videos providing instruction on how to build a similar kit, but I still think a beginner will struggle if he or she tries to build it by himself/herself. This may make a good instructor led project where they can get some hands on help as needed (Note: as I have faced, the real learning will happen as the cheap components quickly go bad where you will have to find replacement part to fix or upgrade you robot).
It took me about 3 hours to build the kit and successfully run the first test code. I intentionally tried to build it as quickly as I can and use only the tools that was provided in the kit. Well.. just like building a plastic model kit, the cheaper the kit, more difficult and more skill that is required to build it. Needless to say, I made many mistakes including breaking some fragile plastic parts. Strongly recommend instructor led, but if you solo it, watch several Youtube videos on building a similar kit and use proper tools. Go slow and try to learn all the components as every part of this simple robot is what you will need to master as a robot engineer (or you will be like me, having to come back to learn all the basics that you skipped)
They provide all the components to build the kit like a small screw driver and a wrench, zip tie etc. However, I really struggled trying build it with what was provided (especially trying to tighten many screws with a tiny screw driver and a tiny wrench - stop and get yourself a good set of tools). Also, the acrylic (plastic) parts were much fragile than I expected. Be careful pulling apart all those small and thin pieces. As I rushed, I cracked a few thin pieces that was weight bearing - it later broke off when I ran the robot.
The servos needs to be aligned to the center (90 degrees) position when you put it together. Having a servo tester is a good idea. However, this is something you will not be able to avoid regardless of how much experience you have. I encourage you to make this mistake - just don’t get too frustrated and never give up. Building a robot means, you will have to rebuild that same robot many many times. Initially to fix your mistakes (like misaligned servos), but later to optimize and improve your robot’s performance. Never give up & keep learning!
Day 2 - 5/11/2021
Well, day 2 of the project. As I always over-engineer everything, I already ordered a few programmable master/slave bluetooth modules and a few IMU sensors (Inertial measurement unit - similar to the sensors in your phone to detect which way the phone is moving etc.) so I can remotely control the robot arm using a separate Arduino controller. Why I always make a “simple and fun” project into some impossible never ending project, I have no idea…. hopefully, I use this opportunity to really understand the bluetooth communication modules and the way IMUs work.
After getting the robot built and run the initial test code to ensure the robot was working, today’s objective was to implement all the external control mechanisms. The video above shows the external joysticks to move the robot arm. The servos have good torque and the movement is very snappy. I like the fact that the robot can be driven by the 5V power supplied to the Arduino board via USB for a single servo operation. I may need an additional power source only if I do movement that requires simultaneously servo movements. After a few hours of stress testing it using some set movements, the claw servo is starting to show problem (not responding quickly).
Okay last test for the day. I was able to implement the bluetooth module on the robot and remotely control it using the Android application that was provided. So it took me two nights work to get everything implemented and tested. However, did you see something dangling from the claw? It is one of the part that was cracked and finally broke off. Also, I managed to burn out the claw servo (not working at all now) and stripped the second servo that raises the arm. Did you hear the robot/servo screaming at me when I raised the arm up?
A little break until the IMU sensors, Bluetooth modules, and the replacement servos arrive.
Day 3 - 5/13/2021
The bluetooth modules and the IMU sensors I purchased arrived. While I spent most of my evening reading up on the IMU documentation and doing some Youtube research, I found these videos that will be very helpful to anyone who wants to start similar project.
This is not the same kit I used. However, the components are very similar except mine was made up of cheaper components like Arduino clone etc.
This video talks about the same issues I’ve encountered like the cracked parts while building, claw servo burning out (it is really funny that he has the part dangling just like I had in my video above), and other issues.
If you plan to use this as an educational tool, these issues are not to be avoided. These problems will provide an excellent opportunity for the young engineers to reflect on what they have not considered, determine how to overcome (e.g. make vs buy replacement parts or better yet, modify the design to avoid the persistent problems from coming back again). Instructor should provide them with a safe environment for them to fail, learn to work together especially during difficult times encourage each other to bring out their strengths. I really do believe these are some of the essential skills that is a par of engineering.
I’ve also included two videos above that I think will help you in building the hardware of the robot
As usual, I am doing the learning “after” I’ve already made all the mistakes. Hopefully, you are much smarter than I am, but I still will encourage you to make these mistakes and learn the “art” of overcoming your failures. Good luck and Never Give-up!
Planned Next Steps
Mount robot arm on a platform and add IO (LCD display + Button) - Done
Configure min & max of the movement and add safety functions - Done
Program display menu structure - Done
Add RGB LED (NeoPixel) and code lighting functions - Hold until later

RESEARCH: Mirobot Robot Arm
Mirobot is a miniature highly accurate robotic arm that was launched via the KickStarter in 2020. As the industrial robots such as KUKA is normally not accessible to most people, Mirobot fill the need for a replica for personal use for education and development.
More information to follow as the project backers are starting to receive the robots.
RESEARCH: Interbotix PincherX 150 Robot Arm
Interbotix PincherX 150 Robot Arm
Uses 8x Dynamixel XL430-W250-T to achieve 5 DOF + 360 degrees of rotation.
45cm reach (90cm total span) with 5mm accuracy
RSO support
https://www.trossenrobotics.com/pincherx-150-robot-arm.aspx
Dynamixel XL430-W250-T Smart Servo Motor
Offer high resolution of 4096 positions and user definable PID parameters
Temperature monitoring, positional feedback, as well as voltage levels, load, and compliance settings are user accessible as well
https://www.trossenrobotics.com/dynamixel-xl430-w250-t.aspx
Related resources
Ubiquity – VM image + Rpi image
https://downloads.ubiquityrobotics.com/
Install ROS on Ubuntu – using Robotis script + Install on Raspbian Jessie
https://acslaboratory.github.io/ros/kinetic-ros-installation-guide/
GitHub - X-Series - ROS Stack
https://github.com/Interbotix/interbotix_ros_arms
Github - PhantomX Pincher Mk3 Arm
RESEARCH: Annin Robotics AR2 & AR3 6 axis Robot Arm
Main Website - anninrobotics.com
Blog - https://www.anninrobotics.com/blog
Forum - https://www.anninrobotics.com/forum
Tutorials - https://www.anninrobotics.com/tutorials
Download & Manuals - https://www.anninrobotics.com/downloads
Robot Kits - https://www.anninrobotics.com/robot-kits
PROJECT: INNFOS GLUON - Modular Desktop Robotic Arm (KickStarter - SUSPENDED)
Innfos Gluon - 6DOF
FINAL UPDATE:
I bid on this Kick Starter project to help me with a robot arm research project.
I’ve really liked the build quality and the modularity of the robot despite the lack of availability of the SW tooling.
This Kick Starter project ended up getting cancelled. All the backers got our money back, but I had to also cancel my Gluon Robot Arm research project.
GLUON is an innovative creation. This robotic arm can perform much more complicated actions without being bulky and expensive. INNFOS integrated motor, drive, encoder and reducer in an all-in-one design jazzed-up actuator that created GLUON. The smart compliant actuator is called INNFOS SCA that breakthroughs the old limits of service robotic industry.
KickStarter Link - https://www.kickstarter.com/projects/1383636492/the-smallest-servomotor-robotic-arm?ref=discovery&term=robot
Gluon 6-Axis | Early Bird - Pledge $759 or more
Get your Gluon 6-Axis Robotic Arm DIY Kit at a better price! Save $540 off the retail price.
Funding Close December 26, 2019
Includes: 6-Axis Robotic Arm DIY Kit
Estimated Delivery: Jun 2020
INNFOS GITHUB PAGE

Kickstarter Update: As of January 2020, the project was suspended & the backing was refunded

Robot Arm - PROJECT VISION & GOALS
VISION
TBD - No clear vision at this time. Research Phase.
GOALS - 2020 (planned to use Innfos Gluon 6 DOF Robot Arm)
Suspended - Robot Arm use case in production
Suspended - ROS implementation of Robotic Arm
Suspended - Simulation & Machine Learning use case
Suspended - Apply Inverse Kinematics - Robot Arm Frame
GOALS - 2021
Completed - Back to the basics - Simple Arduino 4DOF Acrylic Robot Arm Kit
WIP - Implement advanced functionalities to the 4DOF Robot Arm