PROJECT: Dogzilla the AI Robot Dog - Yahboom Smart Mechanical Dog
Yahboom’s AI Robot Dog - DOGZILLA S1
I have been trying to find a good robot dog platform for a while to start my new project. Just like the hexapod (6 legged) and the quadruped (4 legged) robot projects, my robot dog project focuses on the evolution of a robot’s walking posture or “gait”. As such, I needed a solid mechanical platform with a good posture representation of a four legged animal such as a dog. I tried several different platforms including 3d printed options, but I did not find anything that met my needs.
During the lunch time web browsing session today, I found one that I though provided a good starting point for me - Yahboom’s Dogzilla Robot Dog.
Following are some reference for the robot:
Dogzilla Repo - http://www.yahboom.net/study/DOGZILLA-S1
Overview video - https://www.youtube.com/watch?v=JSU1tdqNJ30
Installation video - https://www.youtube.com/watch?v=8b56pwhilv4
Following are some of the key capabilities that stood out for me:
Processors - Raspberry Pi as a main controller for heavy lifting (e.g. computer vision) while the STM32 as a co-processor for driving sensors and movement motor/servos. One upgrade option to consider is to move up to a bit faster processors like JetsonNano in lieu of the RaspPi4B.
Computer Vision - Equipped with a camera module and the OpenCV to achieve some basic “AI vision” functionalities such as face recognition, QR code identification, color identification, and target tracking. One upgrade path is to add a depth camera such as Oak-D-Lite camera.
Accurate Joint Representation - Although many of the quadruped (4 legged) robots have 3 DOF (3 degrees of freedom/3 joints), the position of the servos can have a great impact on the representation of a more accurate walking motion of a 4 legged animal/dog. As you can see in the videos, the Dogzilla have joints/servos in the elbow, shoulder, and the hip that can represent more accurate walking gait of a mechanical dog. Also, the 12 (4 x 3 DOF) joints are represented by 12 bus servos which makes the wiring simpler by daisy chaining from one servo to another.
Kinematics Motion Planning - The joint movement is based on the inverse kinematics. This allows for the omnidirectional motion that is smoother and natural without jigged “robot-like” movements. You can see the robot’s movement in the video that shows forward, backward, left, and right movements & the multi-dimensional attitude control to achieve a stable posture during the various walking gaits. This was probably the biggest selling point for my needs.
Frame - Metallic frame allows the robot to have a slimmer body shape while providing strength and keeping the overall weight down (compared to using plastic body). Also, it allows some modification to the body without significantly weakening the overall structural integrity.
Planned Next Steps
When the robot arrives, take some internal photos of the robot especially the layout of the legs and joints.
Identify major walking gaits available for the robot out of the box.
PROJECT: Neato BotVac Robot - How to install ROS2 Foxy + 64bit Linux Server on a Raspberry Pi4 (and not cry)

A friendly names like a Raspberry Pi, BotVac…. for a moment, I forgot I was still dealing with technology.
As I started the ROS2 project, my objective was to quickly install the ROS2 and get to learning to tools. However, with the various obstacles, I’ve decided to write out the steps and things that will certainly stall me in the future. Following are some of the instructions that I found that explains steps to install the ROS2 on RPi4.
Following are the steps that I have used to install 64bit Linux Ubuntu Server 20.04 + ROS2 on a Raspberry Pi4 8gb model - for use with the Neato BotVac D5 Connect Robot
Download & burn Raspberry Pi4 image to a SD card - 64-bit Linux Server 20.04 - Done
Images are here - https://ubuntu.com/download/raspberry-pi
I used 32gb class 10 SD card - perhaps I may move to 64gb later, but I like 32gb as I can make a quick backup copy of the card or retrieve from a backup around 30min.
Install instructions
Configure Ubuntu 64-bit Linux Server - Done
Default Ubuntu ID & PW: ubuntu
Setup wifi on Ubuntu/RPi4: https://itsfoss.com/connect-wifi-terminal-ubuntu/
caution: when you nano to modify yaml fie, make sure you use 4 spacebar (using tab key will cause error).
only thing I had to do was to modify the yaml file. In my case I had to do the “sudo netplan generate” & “sudo netplan generate” after I added the wifi info on the yaml file.
Tested and made sure I can just power up the RPi4 and remote in headless from my laptop - a good place to make a backup image of the SD card
command used from my Mac - ssh ubuntu@192.168.1.xxx (192.168.1.xxx is the IP address of your RPi4)
if you are retrieving from a backup image and try to connect headless, you may get “warning: remote host identification has changed” message. Use the command here to reset
ssh-keygen -R 192.168.1.xxx <— IP address of the RPi4
Install ROS2 and required packages on the Linux image - Done
Referenced following resources
You may have to run the script below. To learn more about the ROS GPG Key Expiration Incident - ROS Discourse link HERE
sudo curl -sSL https://raw.githubusercontent.com/ros/rosdistro/master/ros.key -o /usr/share/keyrings/ros-archive-keyring.gpg
Update and Setup Locale
sudo apt update && sudo apt install locales
sudo locale-gen en_US en_US.UTF-8
sudo update-locale LC_ALL=en_US.UTF-8 LANG=en_US.UTF-8
export LANG=en_US.UTF-8
Setup Sources
sudo apt update && sudo apt install curl gnupg2 lsb-release
sudo curl -s https://raw.githubusercontent.com/ros/rosdistro/master/ros.asc | sudo apt-key add -
sudo sh -c 'echo "deb [arch=$(dpkg --print-architecture)] http://packages.ros.org/ros2/ubuntu $(lsb_release -cs) main" > /etc/apt/sources.list.d/ros2-latest.list'
Install ROS2 Core Packages - base package includes many other packages
sudo apt update
sudo apt install ros-foxy-ros-base
Install Colcon (Build Tool)
sudo apt install python3-colcon-common-extensions
Auto-completion for ROS2 command line tools (optional, but recommended)
sudo apt install python3-argcomplete
Configure Your Environment for ROS2 & Build Test - Done
Add instruction to source your ROS2 environment on the bashrc file
echo "source /opt/ros/foxy/setup.bash" >> ~/.bashrc
To conduct a build test, we are creating a workspace folder called “robot_ws”. You can change it to any folder name you want. Following commands test and confirm the install - you will see following folders created: build, install, log, src
Note: your current directory/pwd is /home/ubuntu.
mkdir -p ~/robot_ws/src
cd ~/robot_ws/
colcon build --symlink-install
Install and Configure the BotVac - Done
Install required packages
sudo apt install build-essential
sudo apt install ros-foxy-xacro
sudo apt install python3-rosdep2
Clone packages for the BotVac & Build
cd ~/robot_ws/src
git clone https://github.com/jnugen/botvac_node.git
git clone https://github.com/jnugen/neato_robot.git
git clone https://github.com/kobuki-base/cmd_vel_mux.git
git clone https://github.com/kobuki-base/velocity_smoother.git
git clone -b foxy-devel https://github.com/ros-planning/navigation2.git
cd ..
rosdep update
rosdep install --from-paths src --ignore-src -r -y
colcon build (note: the build time for me was around 49min)
source install/setup.bash
Launch ROS2 on RPi4 (Note: RPi4 will have to be connected to the BotVac via micro USB) - DONE
ros2 launch botvac_node botvac_base_only.launch.py
If you see a screen like below with no error, you are good to go. Congrats!

Troubleshooting ideas
If you are like me, things will certainly not go right the first time or the second or the third time. Following are some of the issues I had and the way I fixed it.
This is really more to help me reference as I run into issue in the future when I reinstall ROS2. Hopefully, some of workaround here can help you troubleshoot your issue as well.

ERROR: Could not access serial port: /dev/ttyACM0” & ERROR: Could not connect to Botvac
ISSUE: RPi4/ROS2 is not seeing the BotVac robot - if you see the error similar to the screenshot above (Error: “Could not access serial port: /dev/ttyACM0” and/or “Could not connect to Botvac”)
When the Neato robot is properly connected, it will show up as “ttyACM0” in the /dev directory. If it does not show up, try the following
Unplug the micro usb cable and plug back in to see if it will appear. You can also try rebooting the RPi as well.
Try to change the micro usb cable. Some of the cheap cables are rates for charging only (no support for data transmission) so make sure you are using a proper cable.
This is the one that bit me. I used the shortest cable I had, but that caused the problem.
ISSUE: The Linux OS installed fine, but start getting bunch of error message while trying to install ROS2.
There is a known issue that was due to ROS GPG key. Reference HERE. Use the short script they have provided for ROS2. In my case, that fixed the majority of the issues while trying to install ROS2.
ISSUE: Every thing worked and tested fine. However, a few days later, I start receiving error when trying to launch the ROS2/Neato script - ros2 launch botvac_node botvac_base_only.launch.py
Try reinstalling the steps in Step #5 - Clone packages for the BotVac & Build.
I had to do this a few times. I suspect it has to do with how I ended the session on the previous day. I am not sure yet what I am doing wrong, but running the steps from the Clone packages on the #5 seems to fix the problem.
Planned Next Steps
Test drive the robot headless (remotely) from a separate ROS2 computer. Since I only installed the most essential applications on the RPi, I will have to use the laptop/PC with full suite of ROS2 to use navigation functions. Since I am new to these tools in ROS2, I am going to take time learning all about the tool and get started.
Also, I have to learn about the robot both mechanically as well as its software APIs. All the information I gather will be included in the next project update.
This is for my personal use - Reference material while I am studying ROS2.
Neato BotVac
For reference
Neato D5 Review - https://smartrobotreviews.com/buying-guide/neato-botvac-d5-connected.html
Neato Pi Hack - https://www.robotshop.com/community/robots/show/neato-robot-with-raspberry-pi-hack
Hackaday - https://hackaday.com/tag/neato/
Servo Magazine - https://www.servomagazine.com/magazine/article/neato-ros-robot-navigation
questions & discussions: http://www.robotreviews.com/
Nav2 - https://roscon.ros.org/2019/talks/roscon2019_navigation2_overview_final.pdf
——-
research workaround
https://www.youtube.com/watch?v=fxRWY0j3p_U
https://www.youtube.com/watch?v=AmuLiA840fA
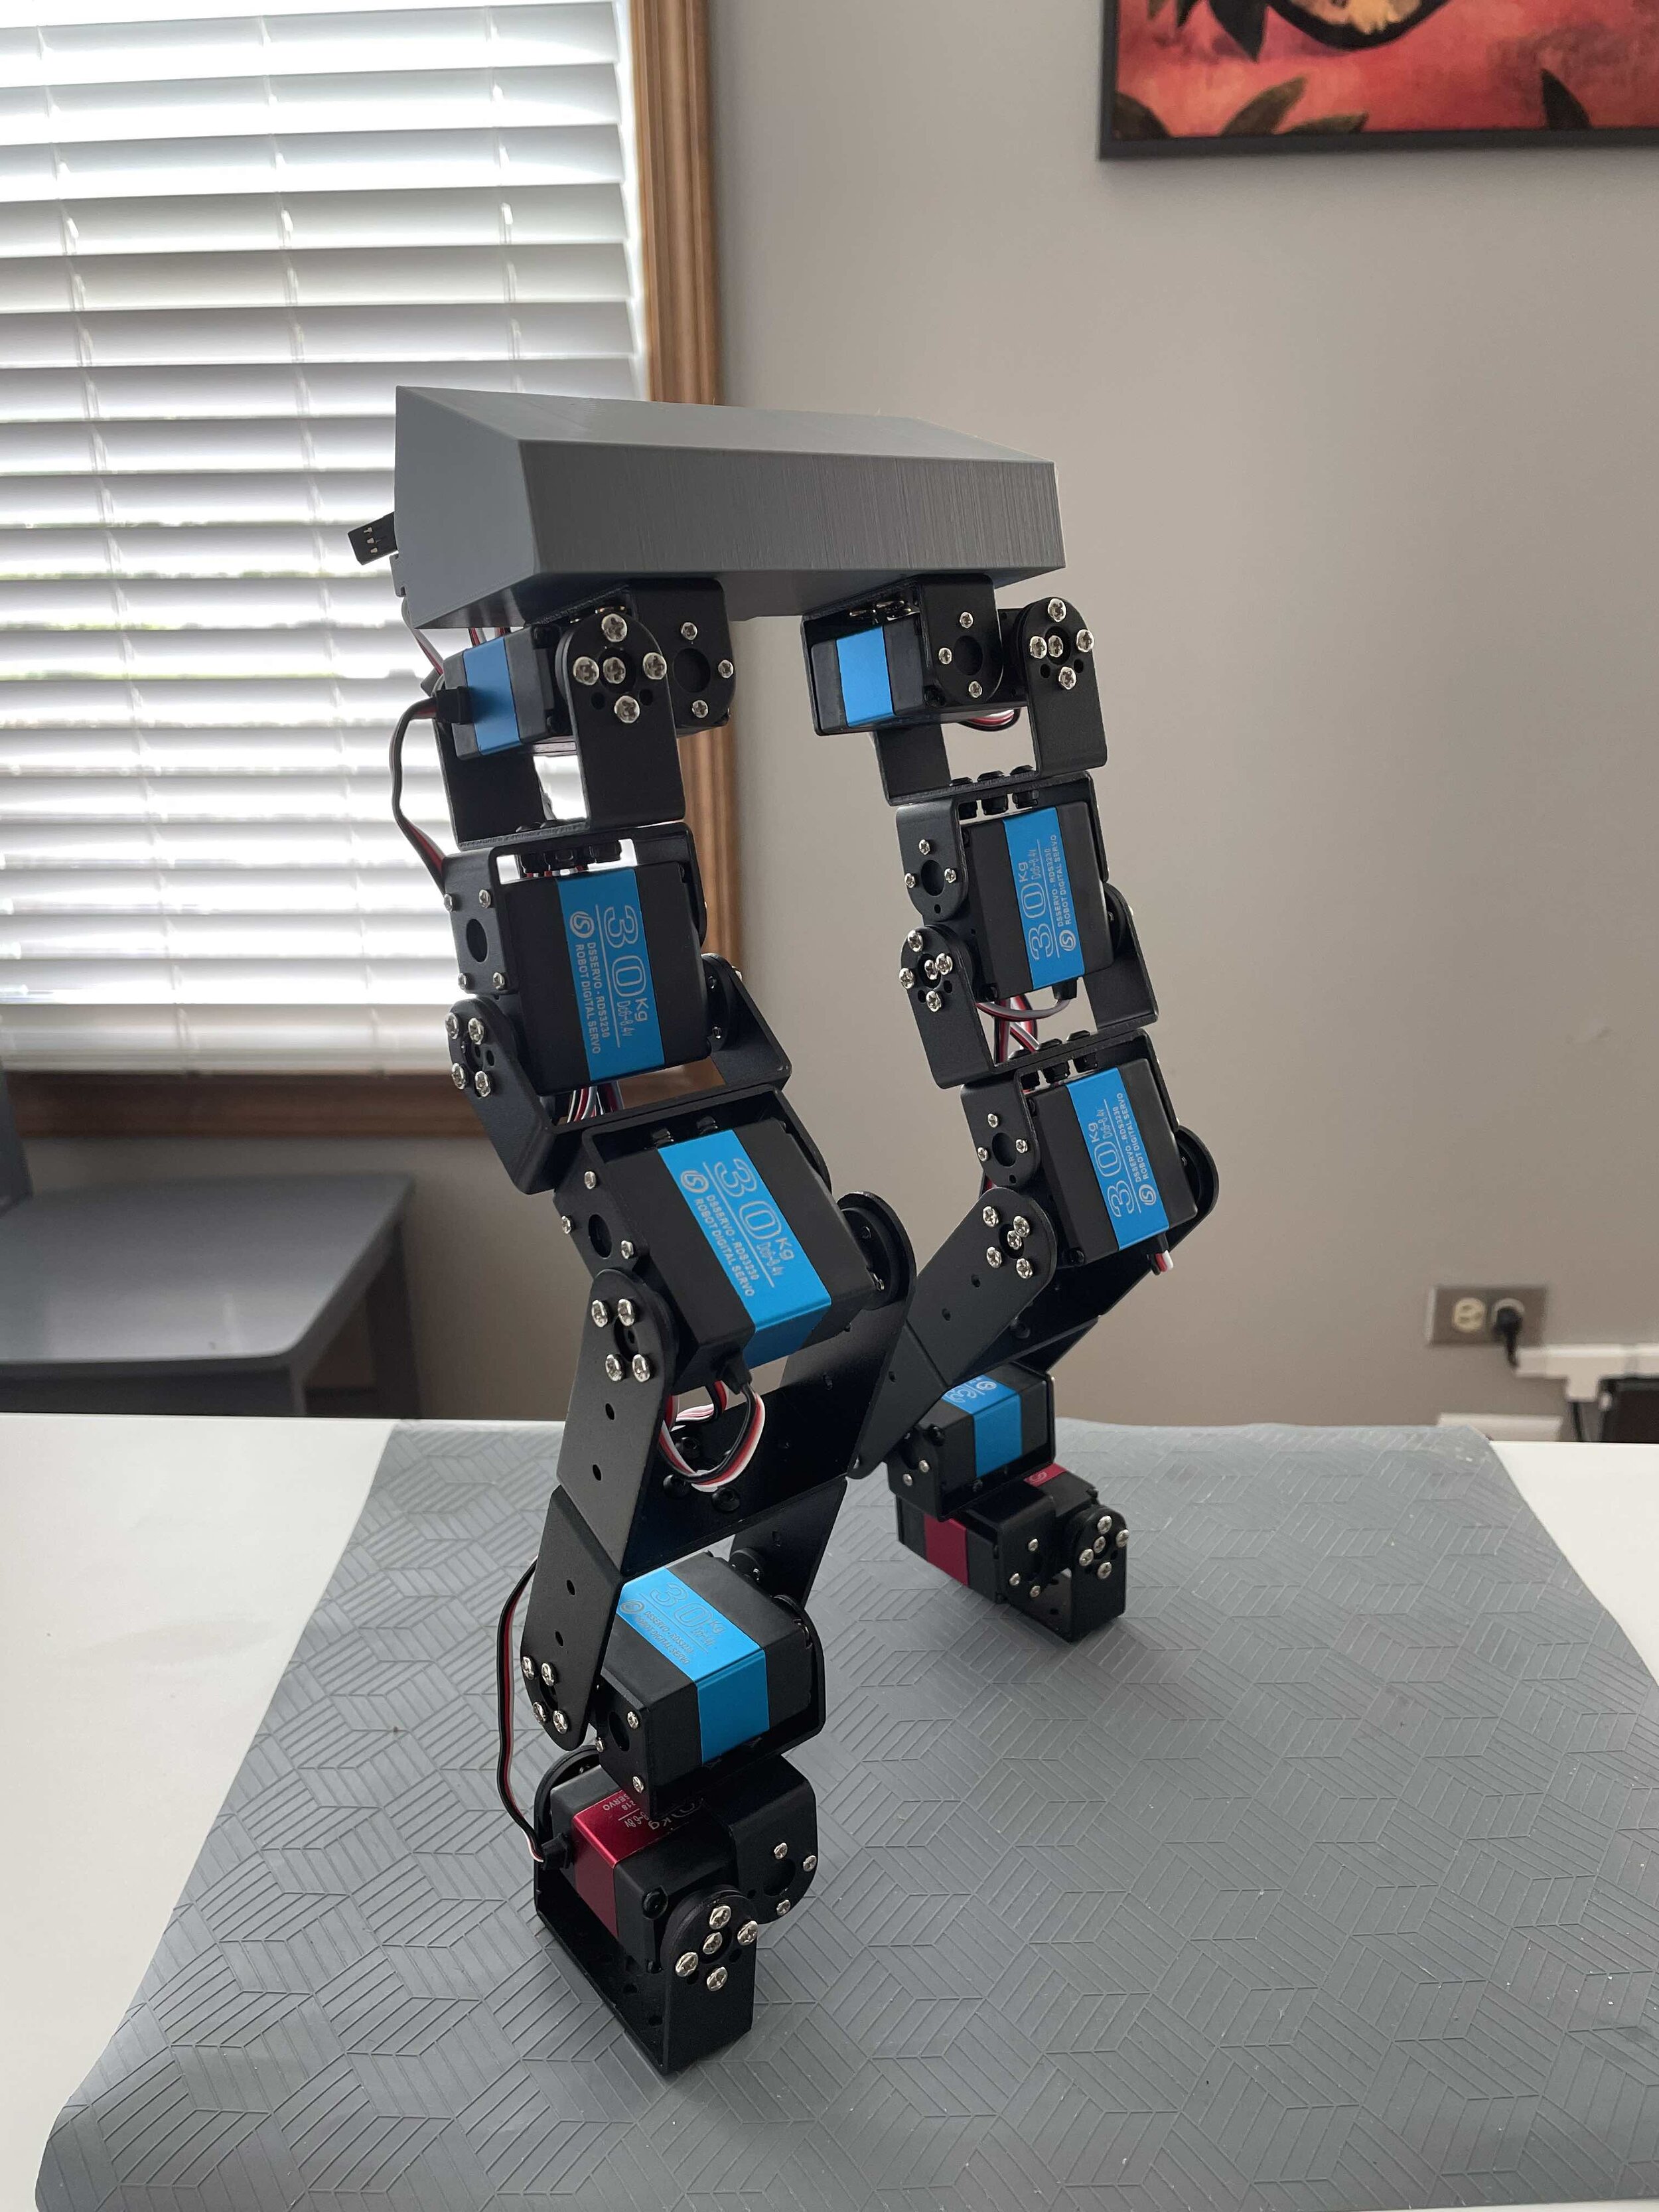
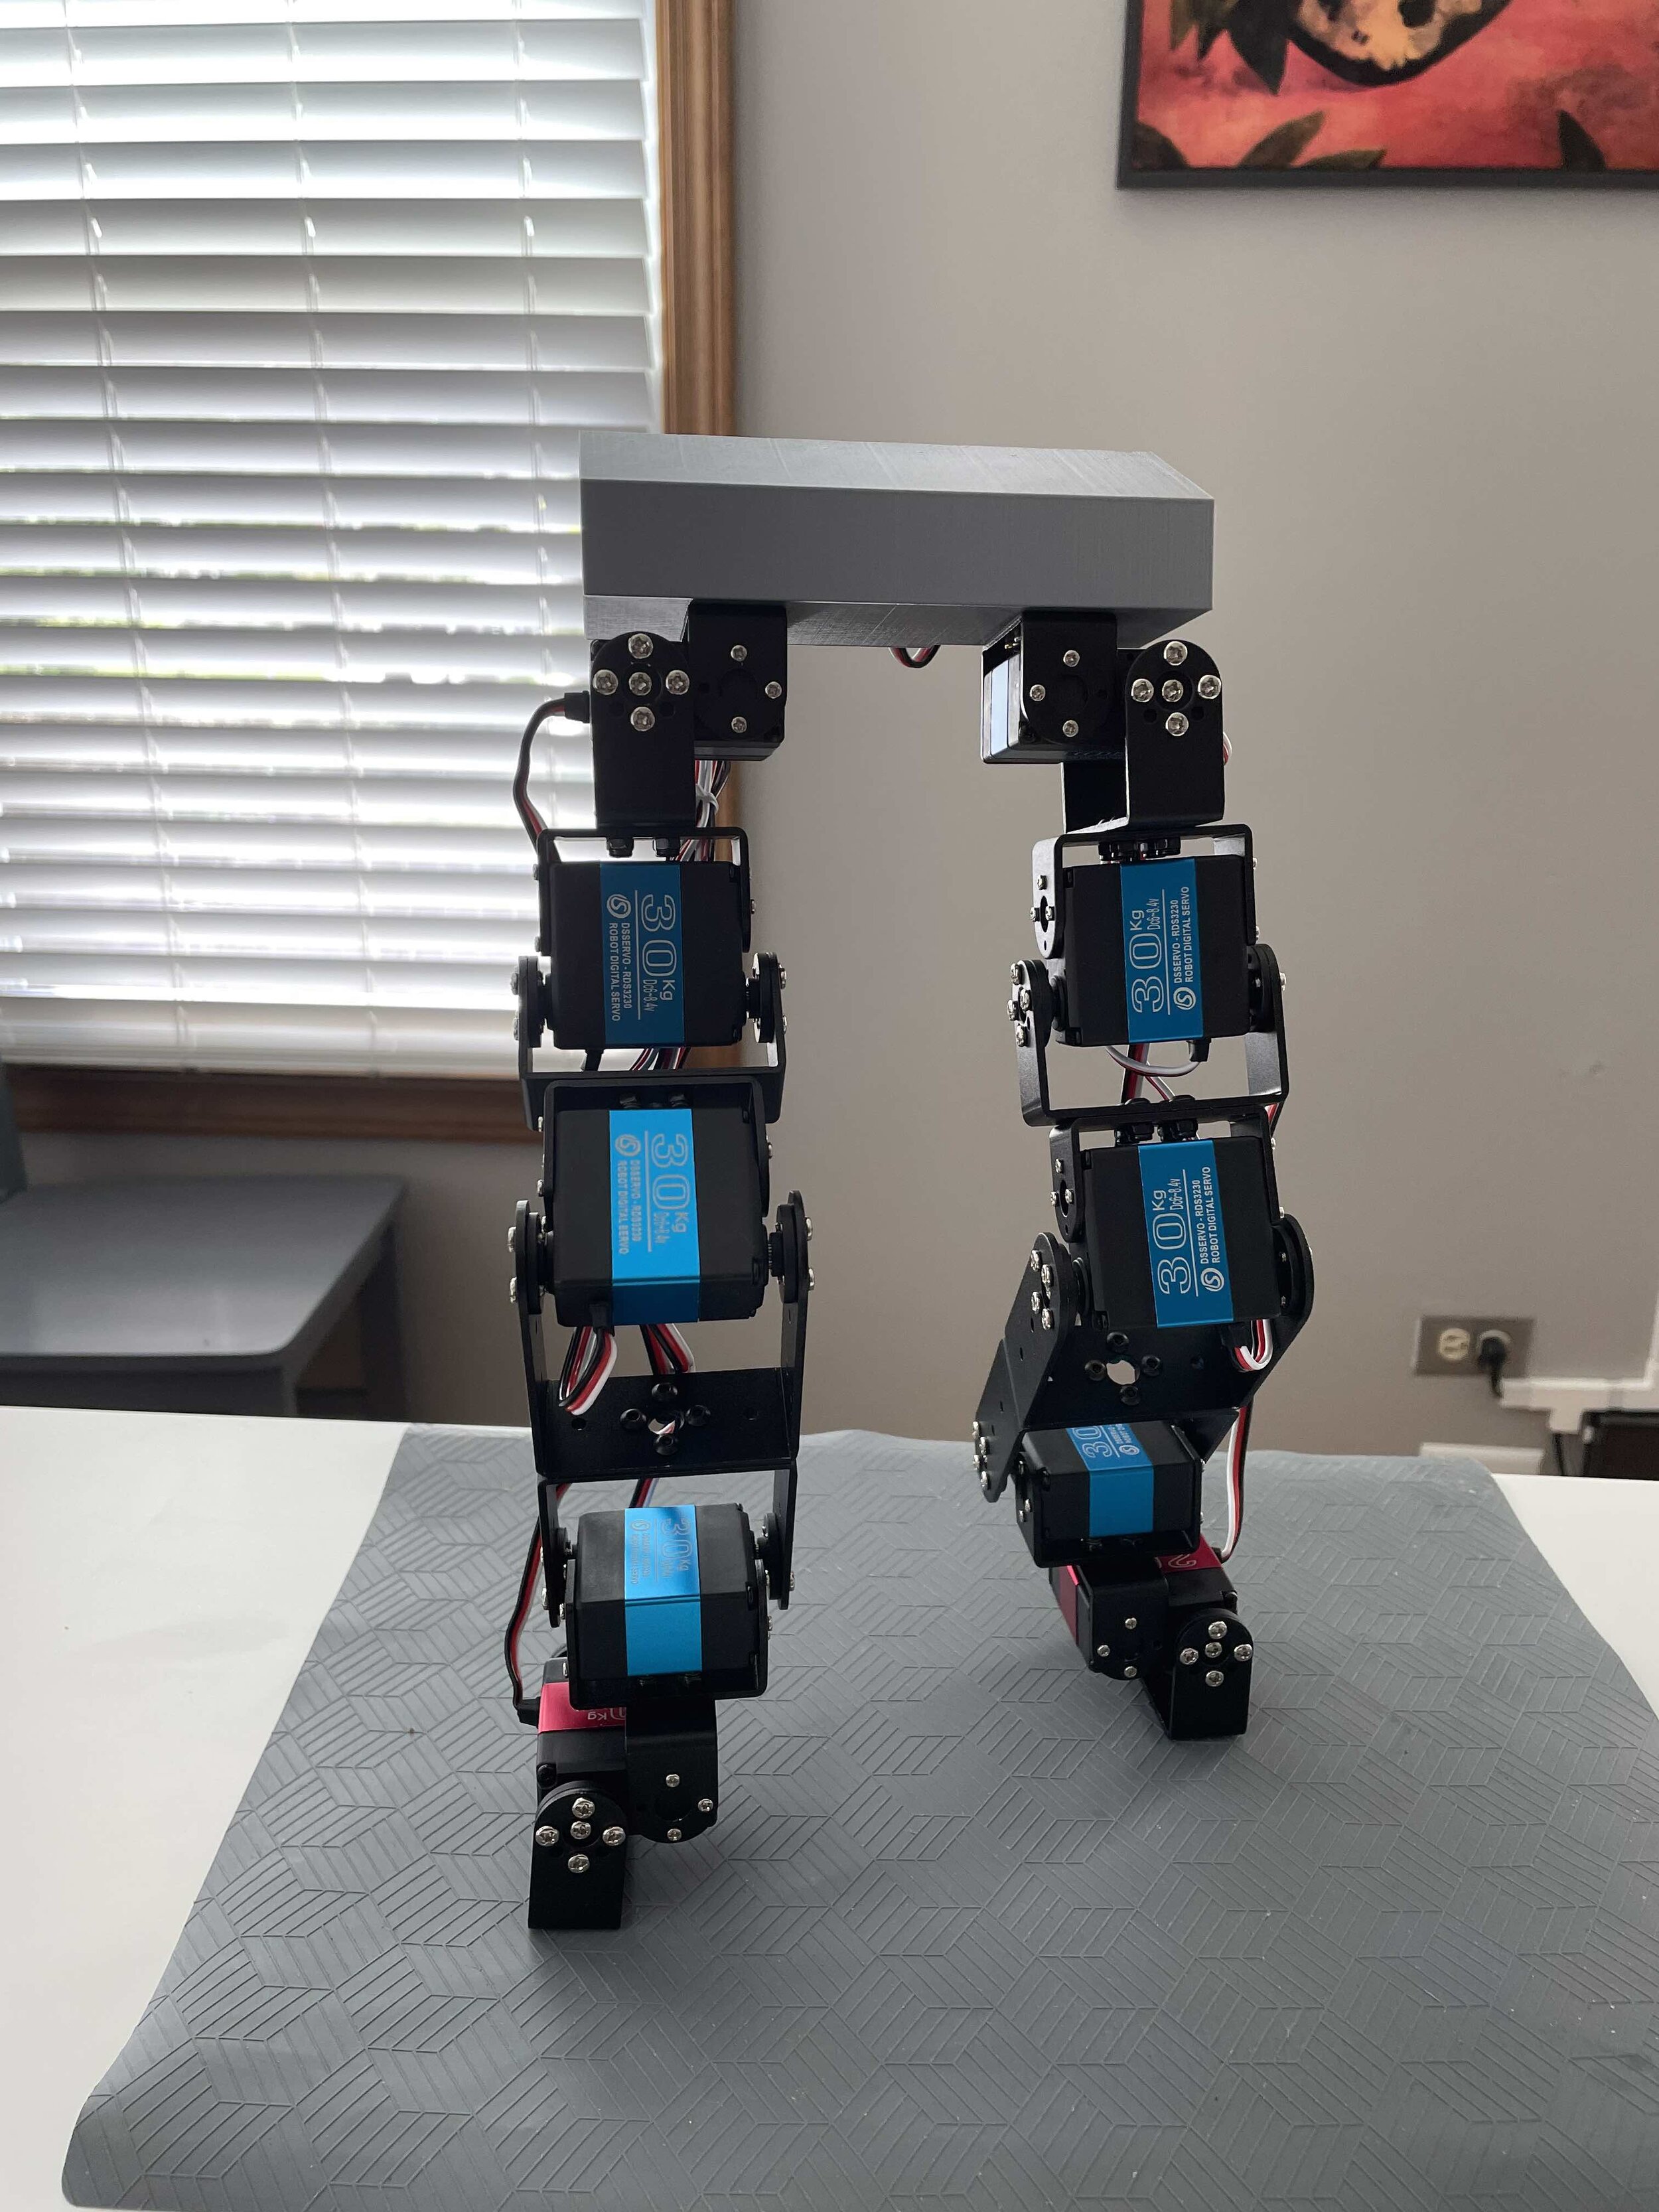
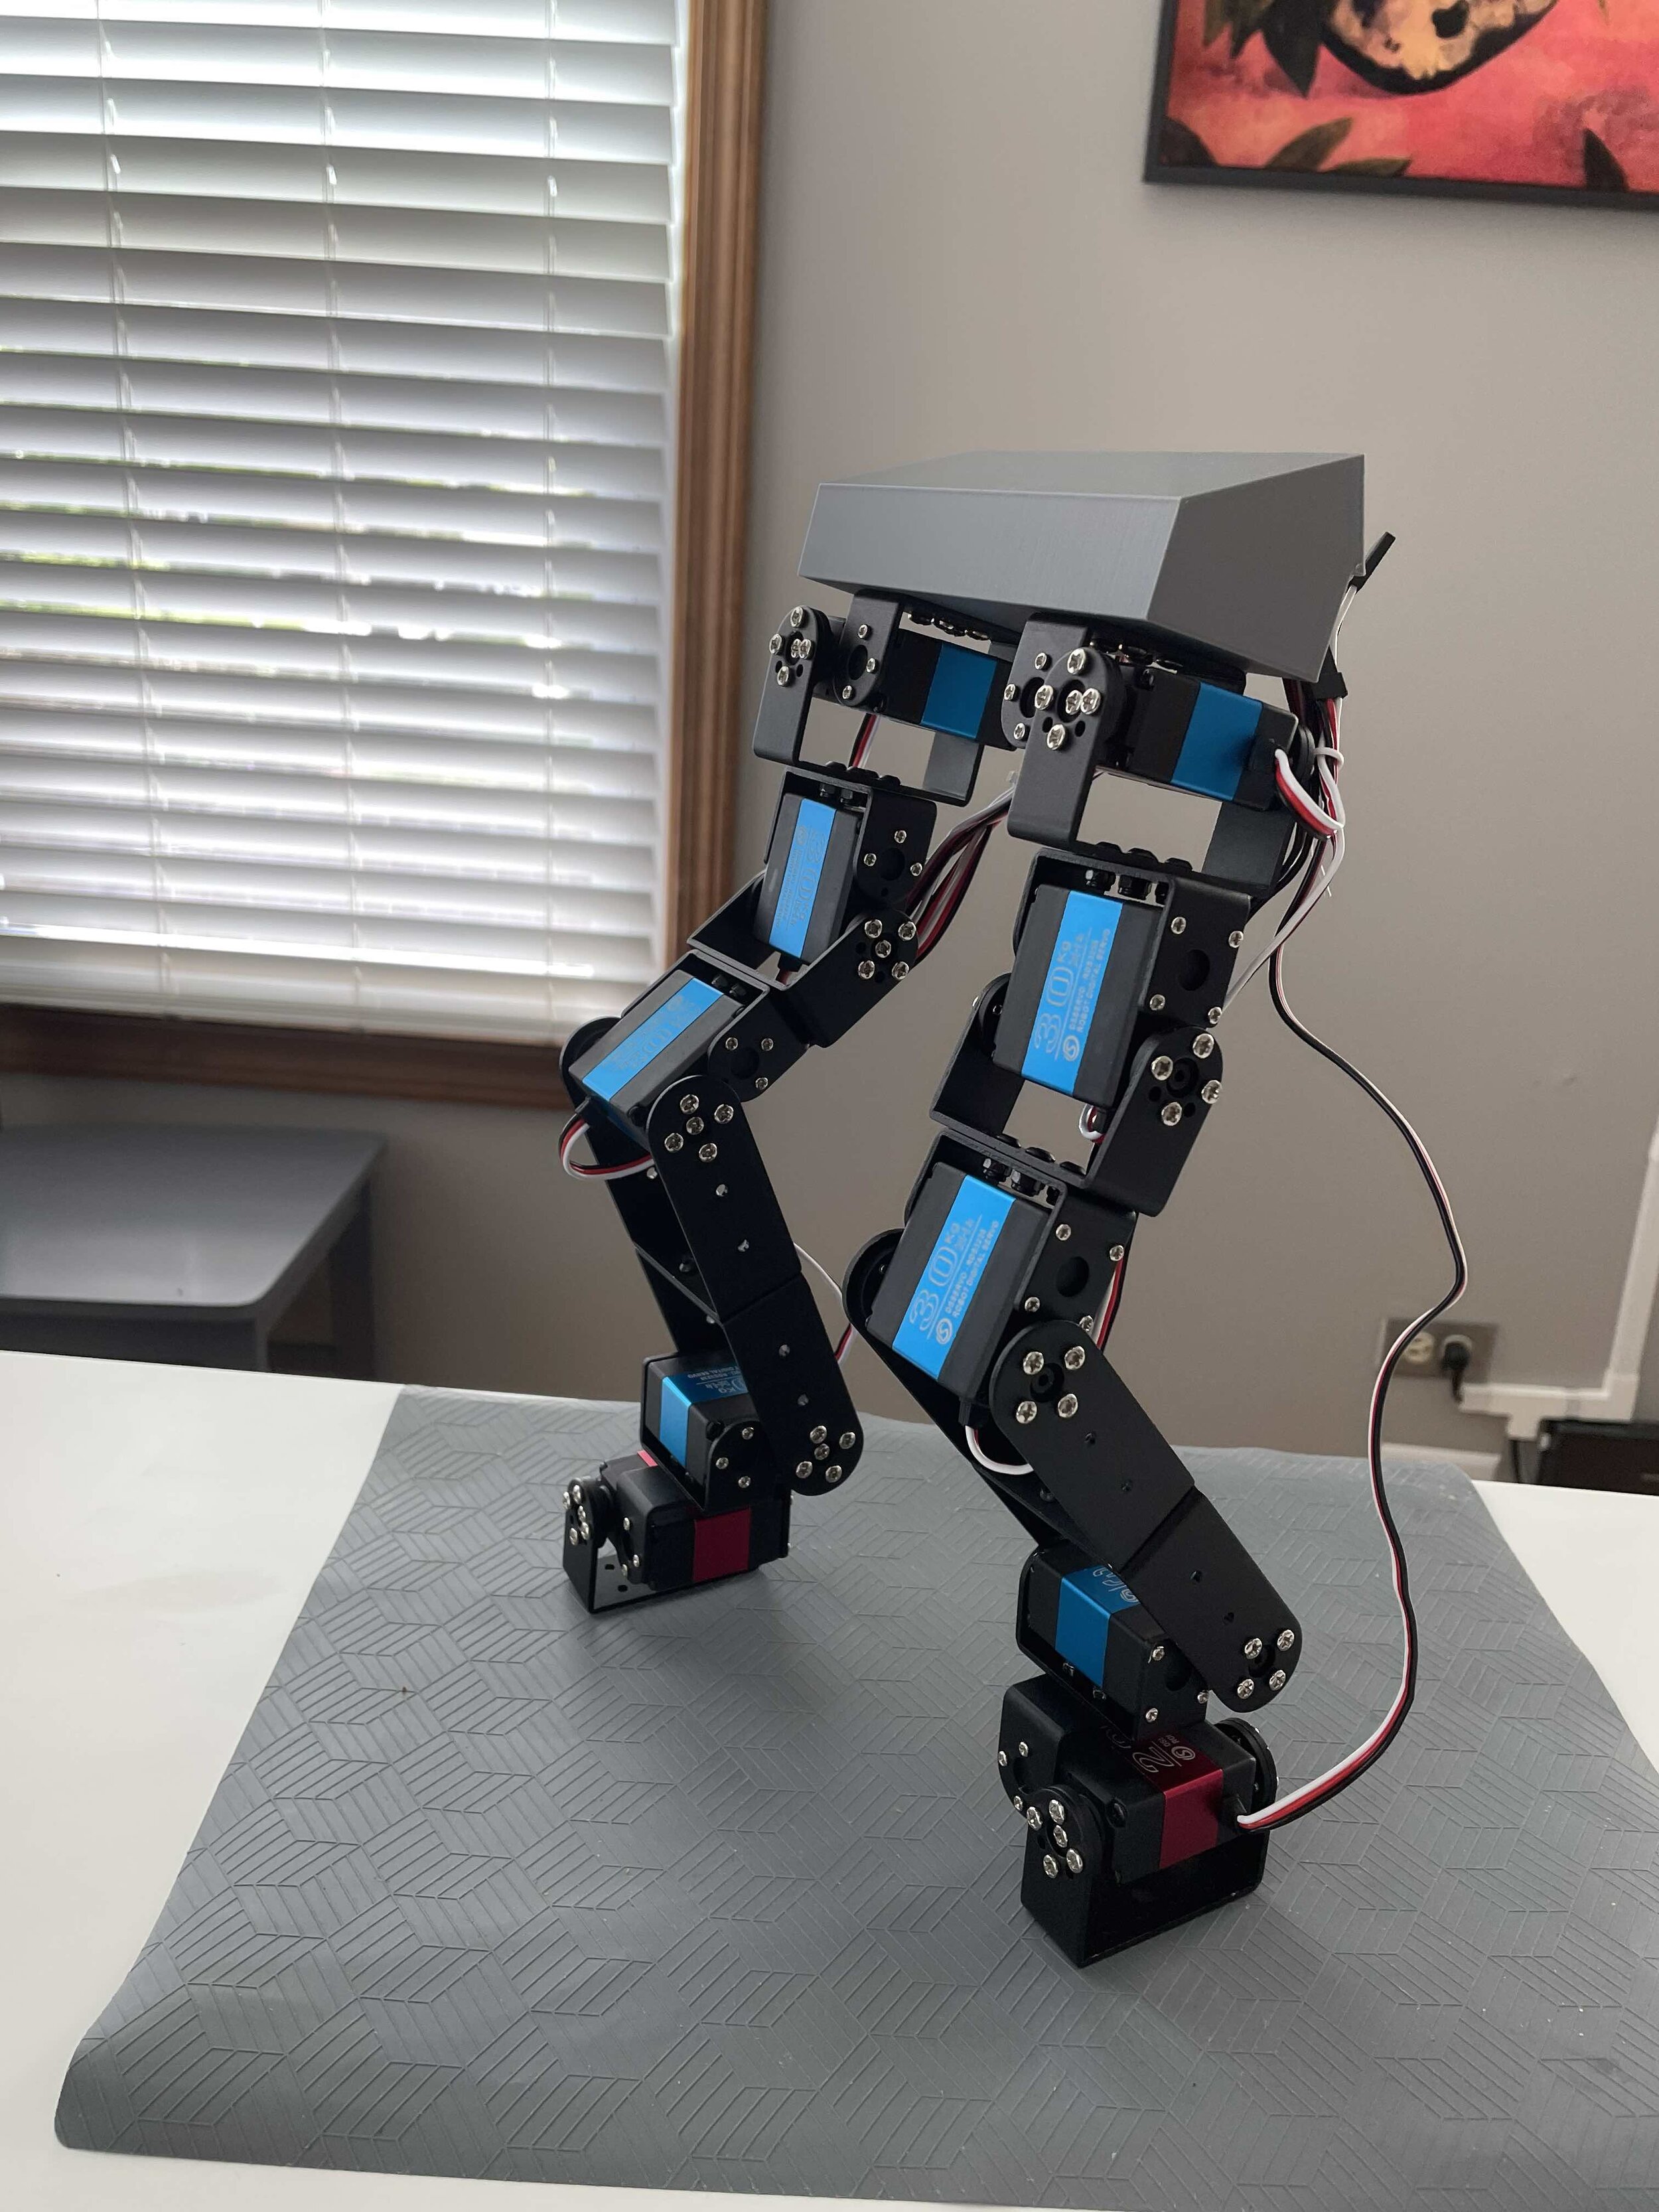
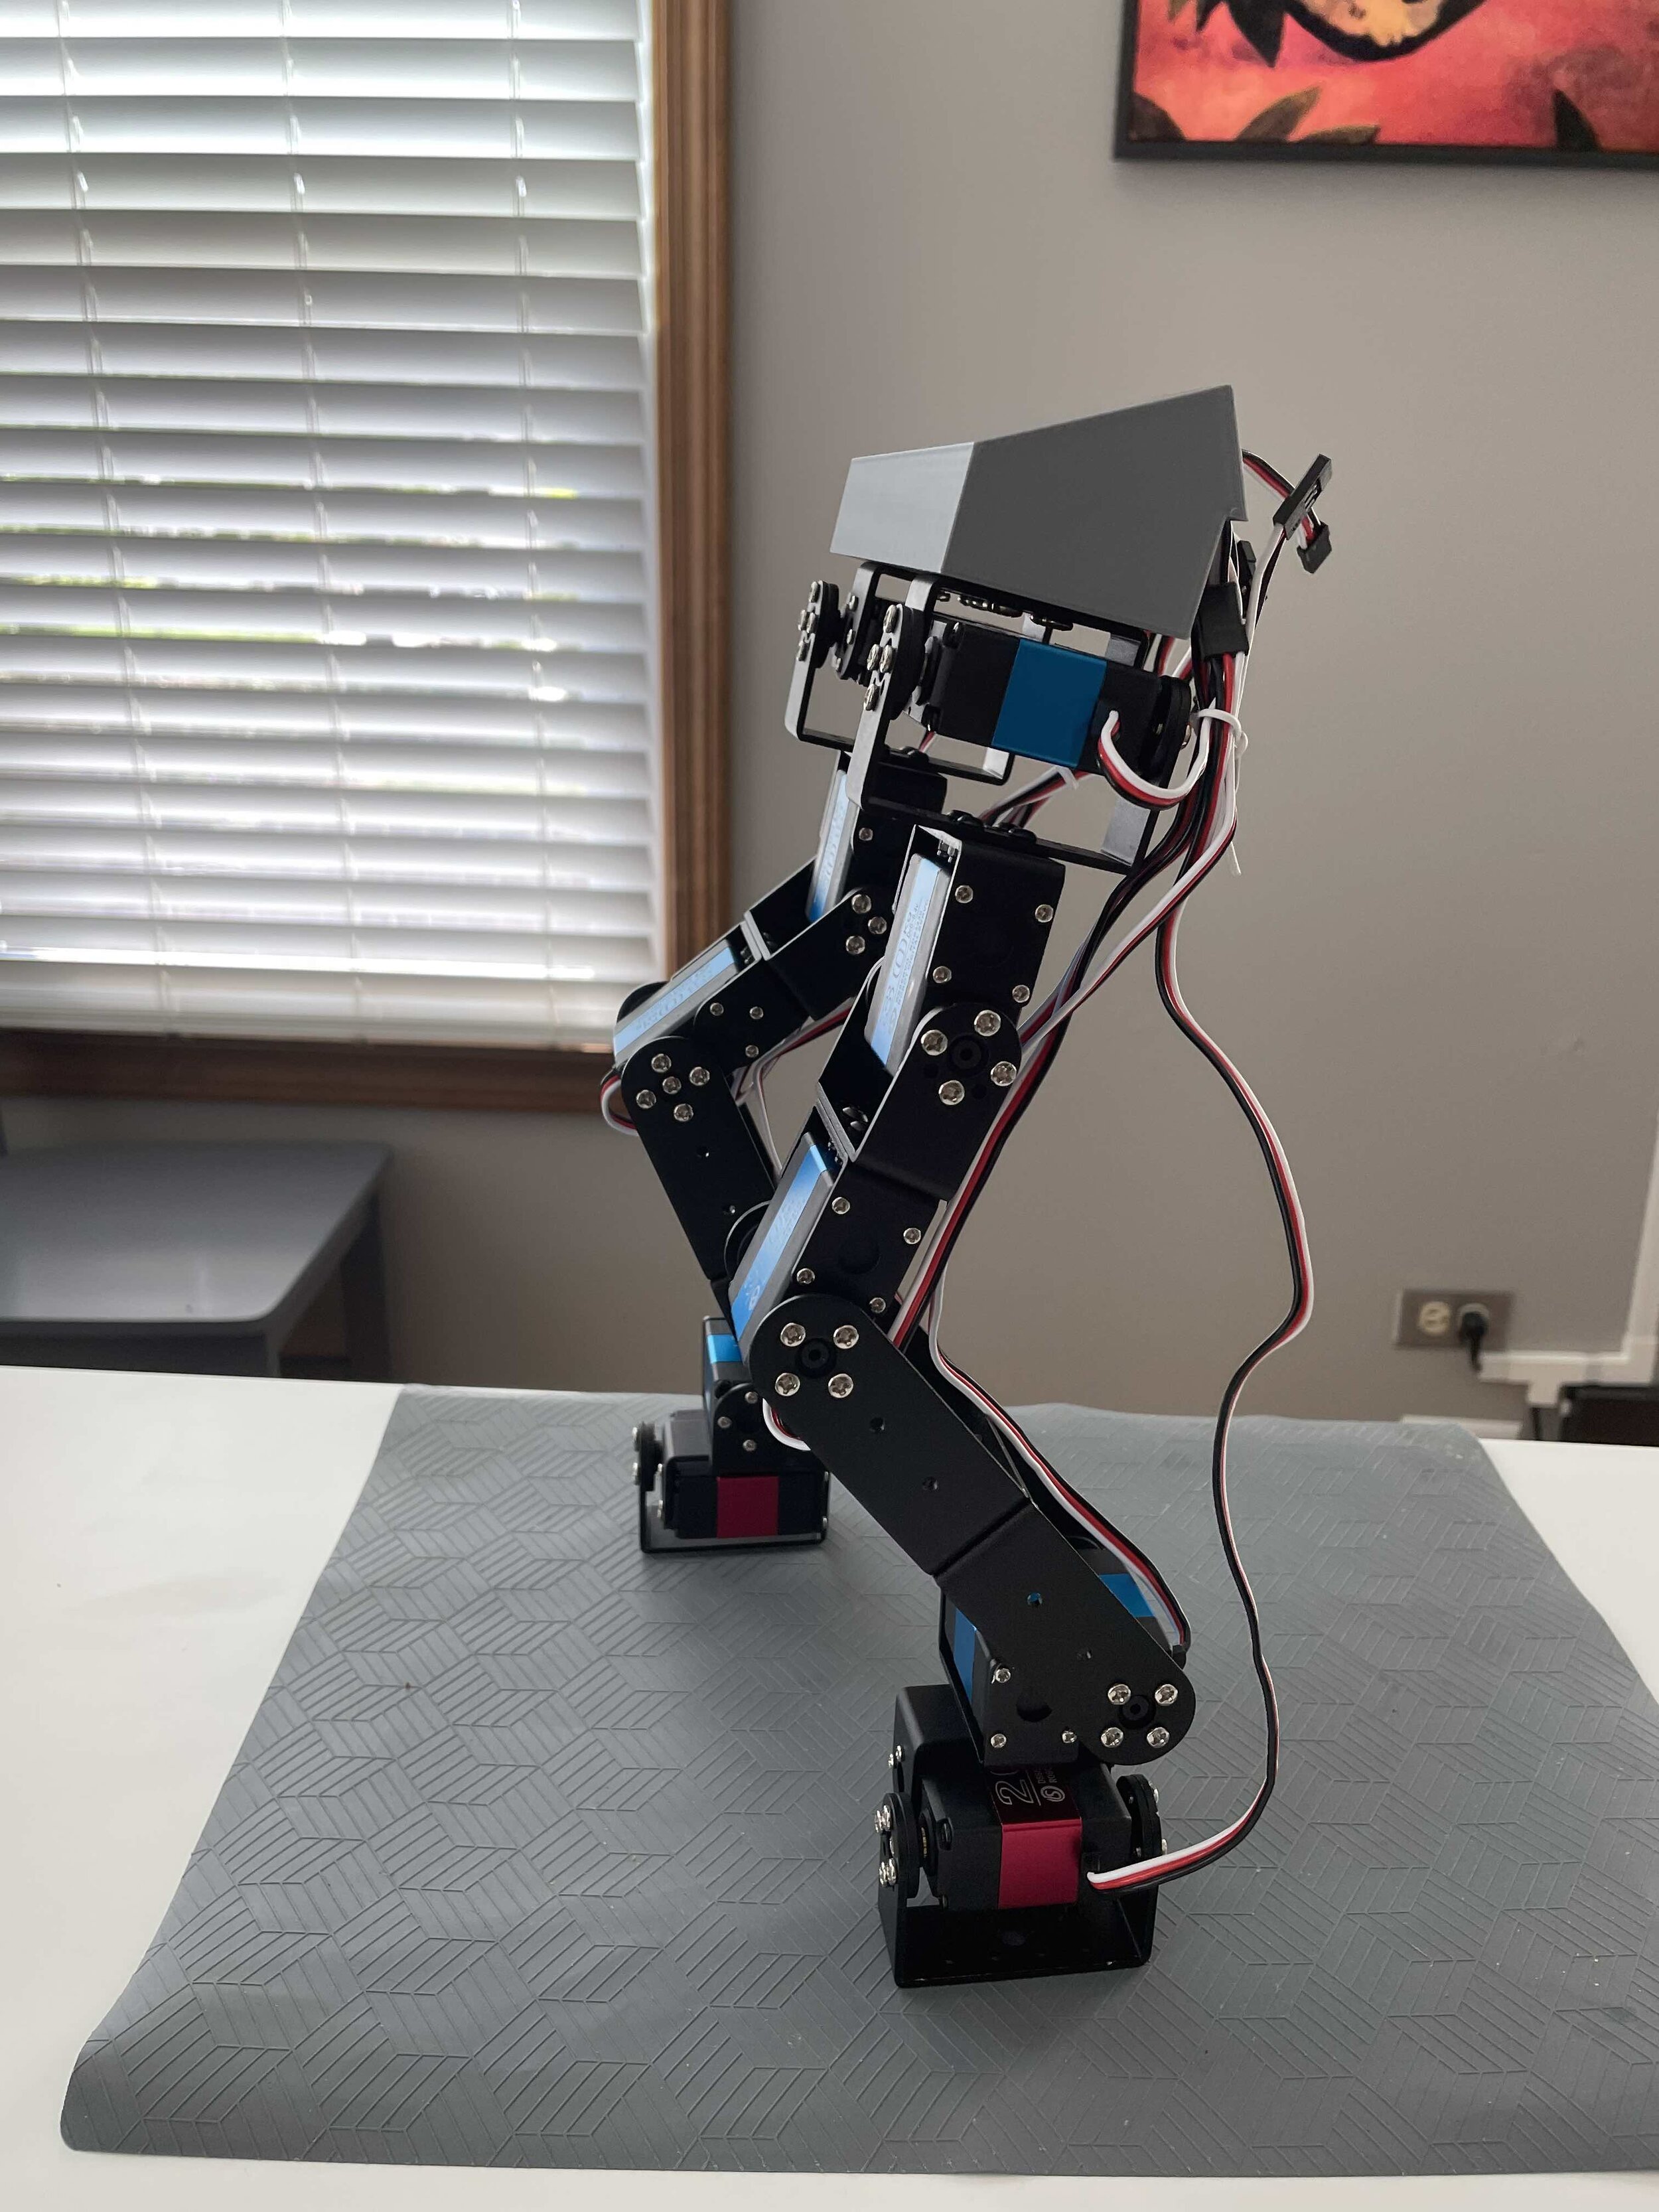
PROJECT: Biped Self Balancing Humanoid Robot - Bare metal robot using hobby servos
The blog post on TechnologyX2 discusses the author's decade-long experience with autonomous drone technology and biped (two-legged) humanoid robots. The focus is on a recent project involving a simple bipedal robot built with hobby servos and a 3-axis gyro sensor. This sensor helps the robot maintain balance by detecting angular changes and responding with compensatory movements. Inspired by advancements in robot soccer players and the Thousand Brains theory by Jeff Hawkins, the author aims to explore new theories and applications in robotics, starting with the basic construction of the robot's lower half using high torque servos. The project is seen as a long-term endeavor, continuing the author's exploration of AI and robotics. For more details, you can view the full post [here](https://www.technologyx2.com/blog_hightech/2021/6/6/project-bipedal-self-balancing-humanoid-robot-bare-metal-robot-using-hobby-servos).
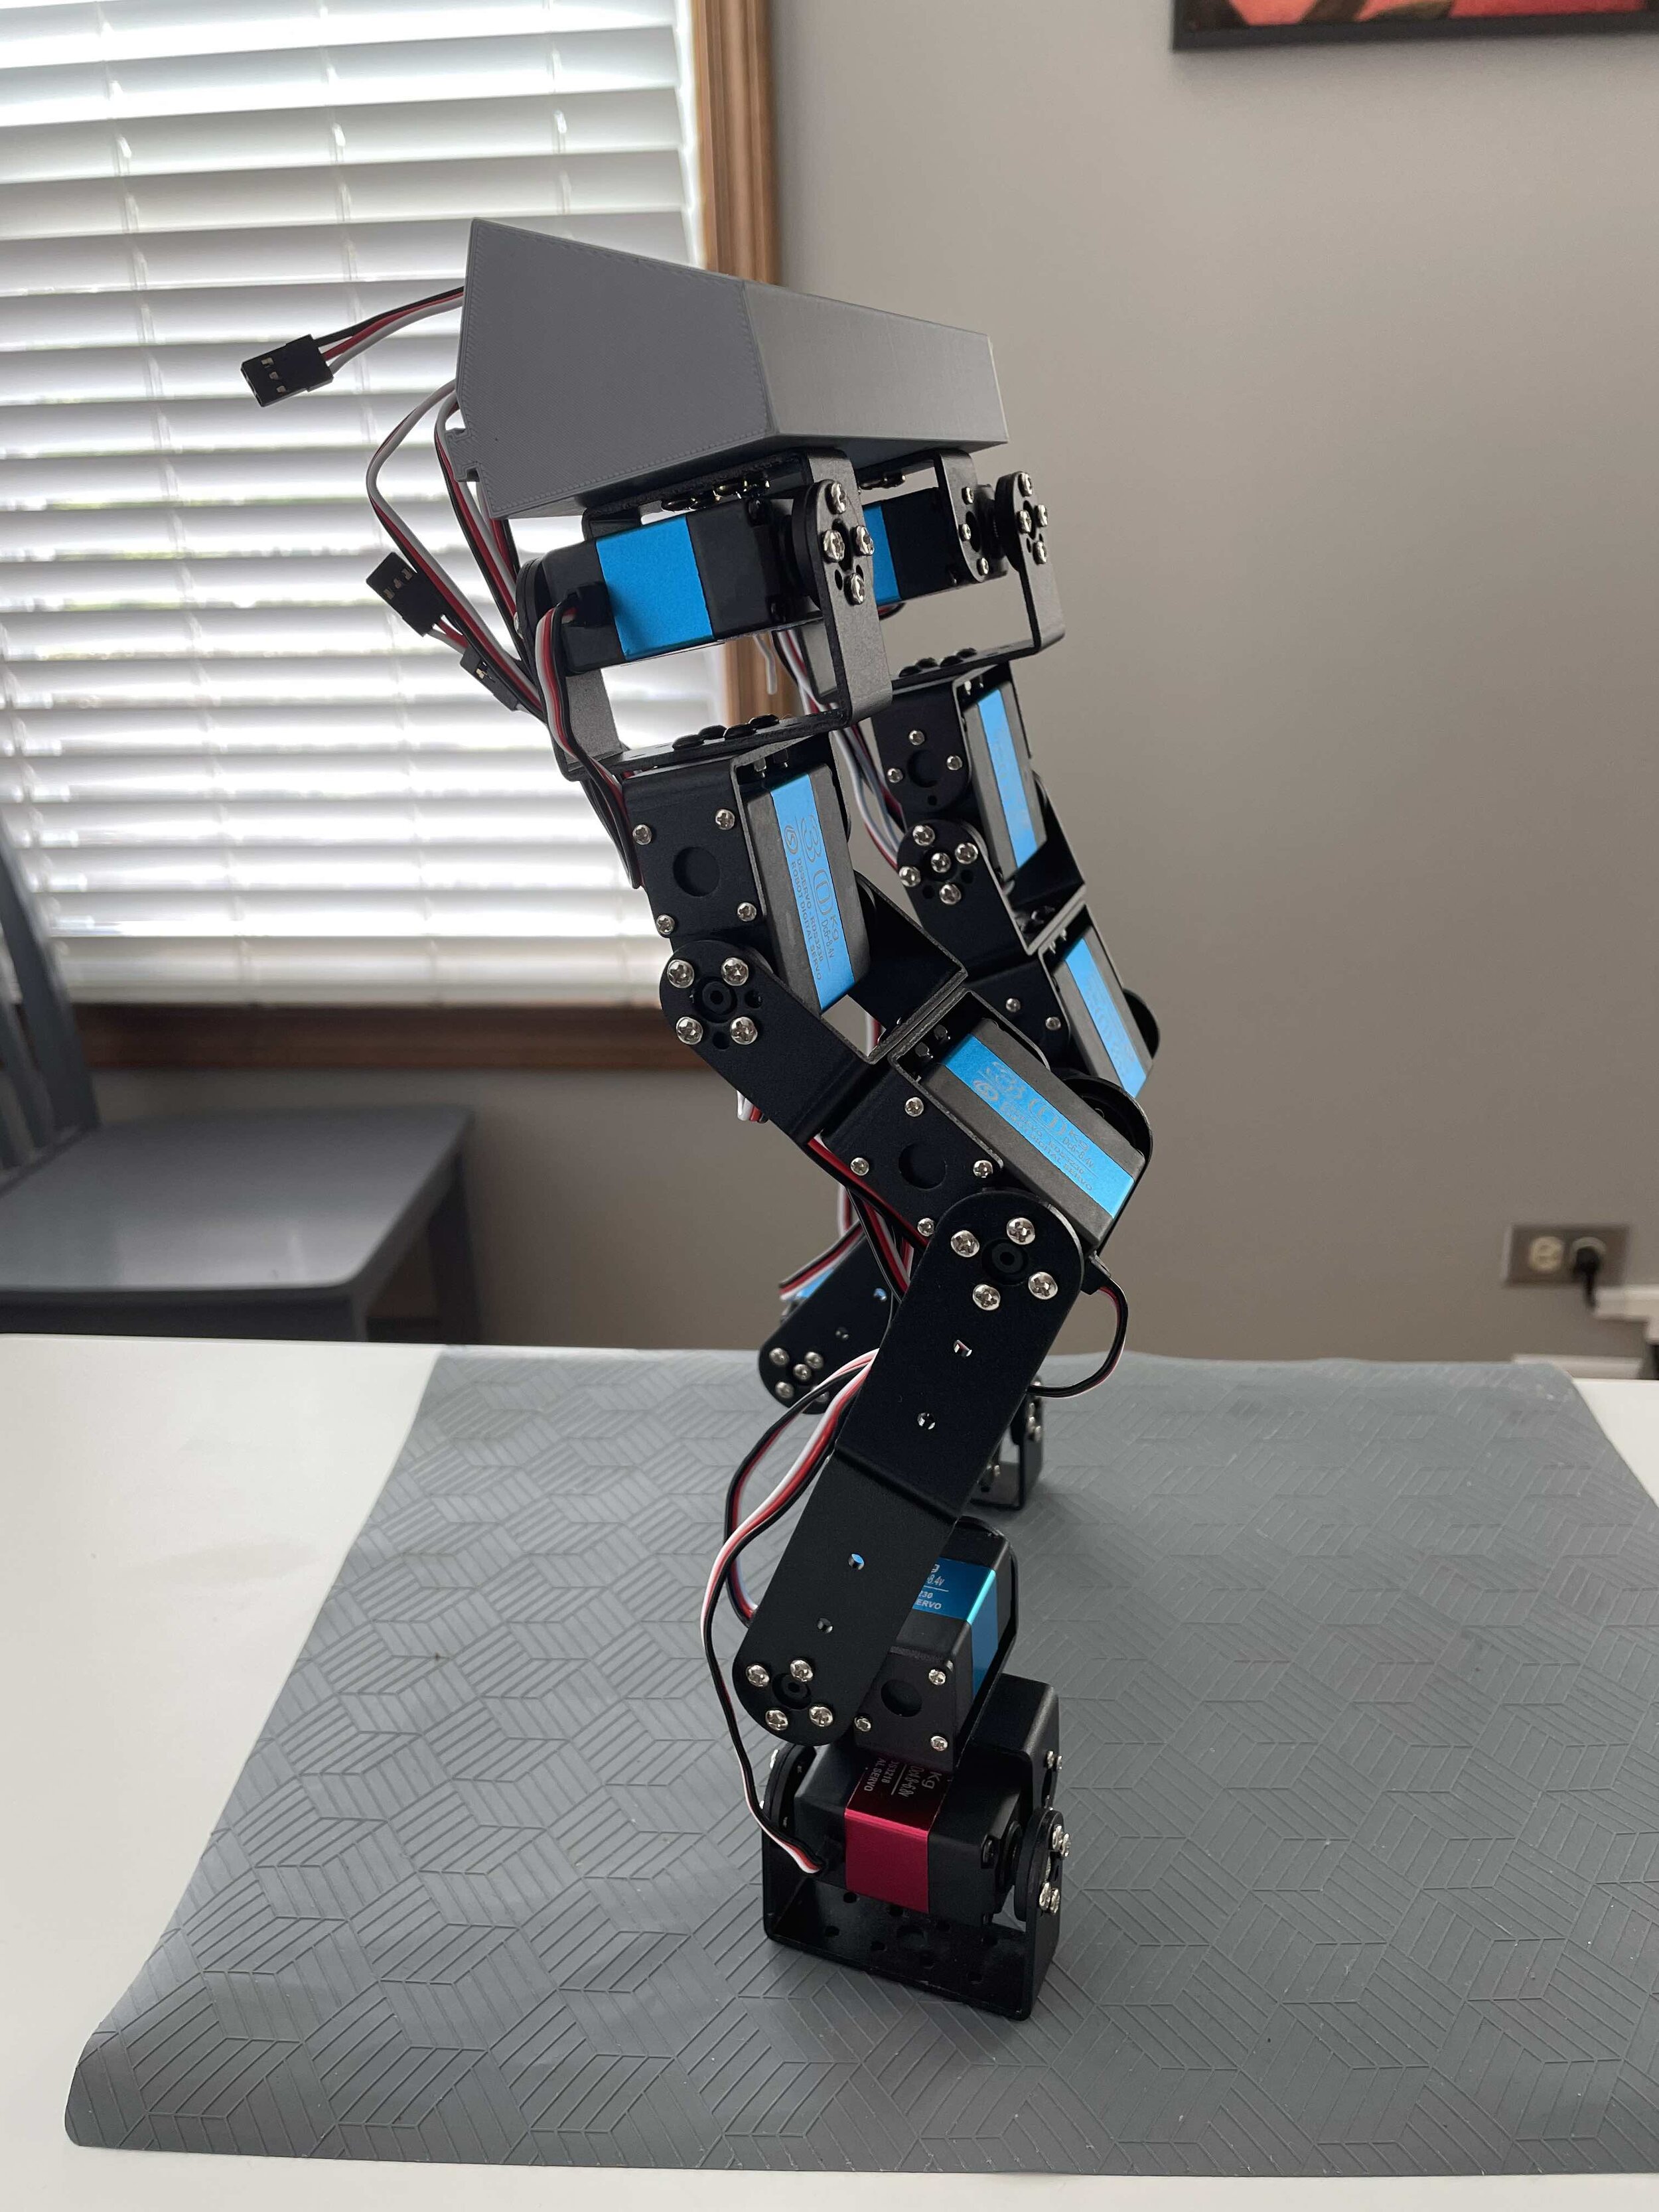
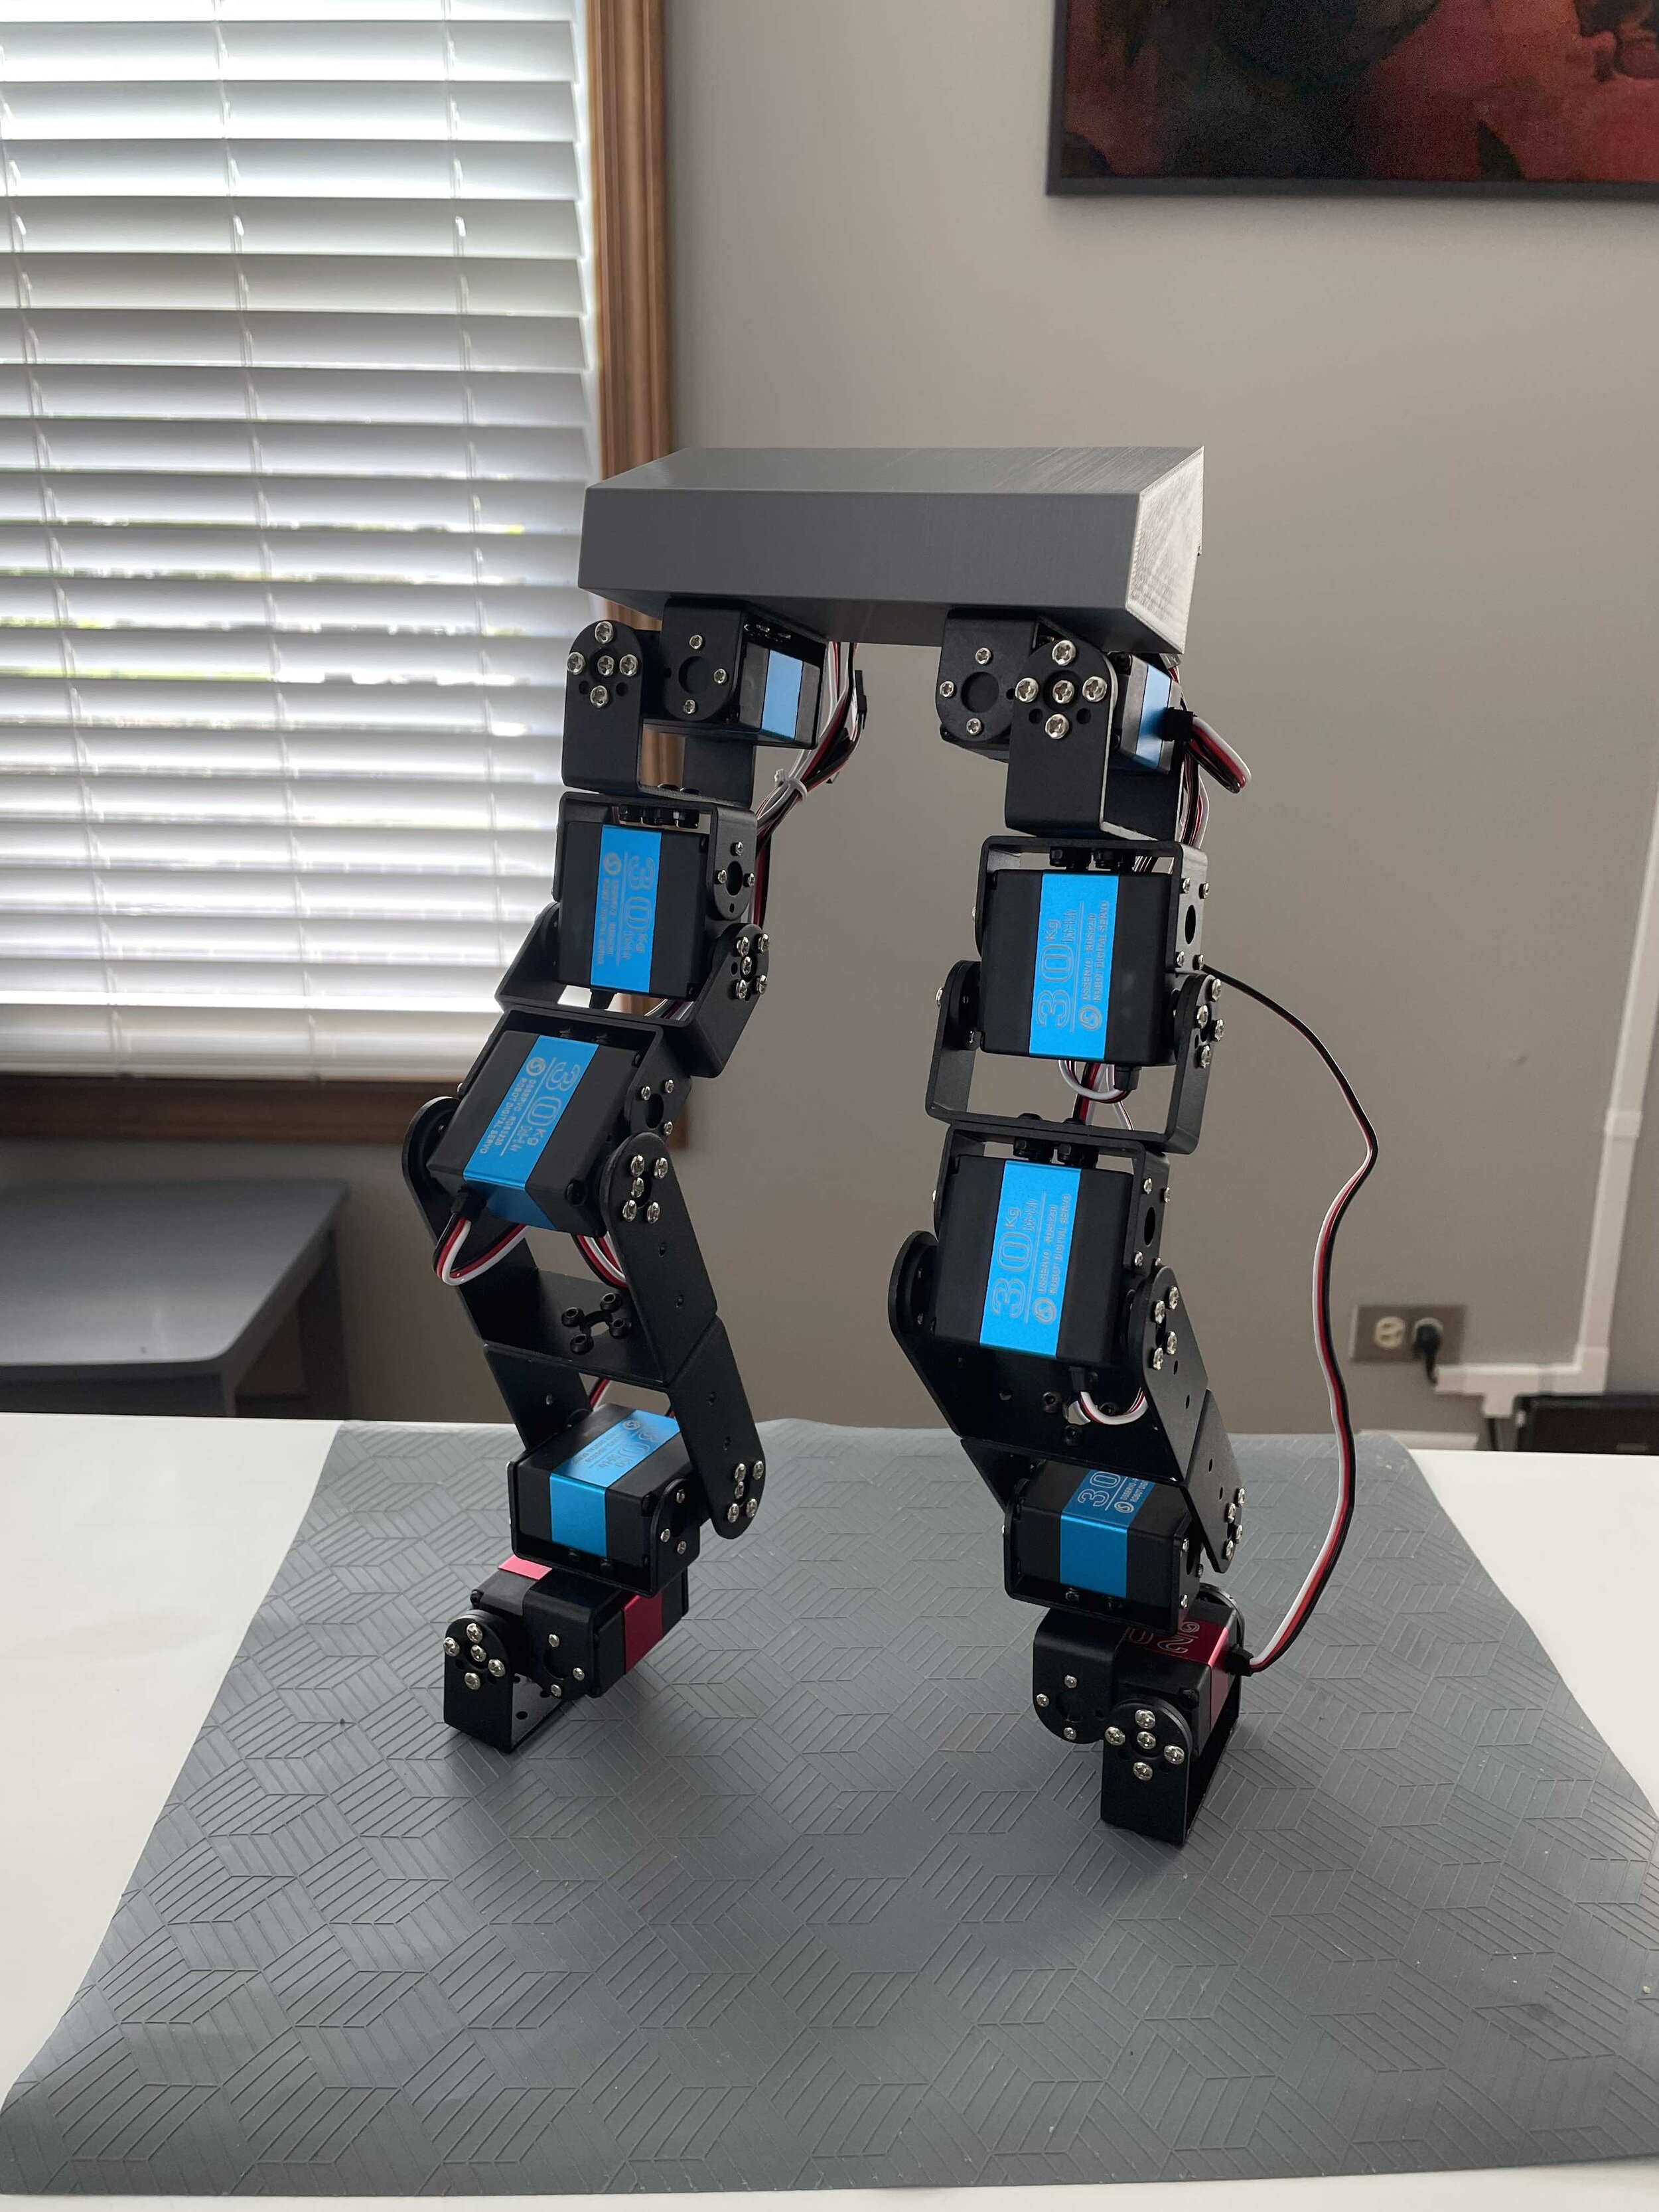
A better part of my last 10 years have been spent working on the autonomous drone technology and a biped (2 legged) humanoid robots. Just like Dr. Guero’s passion projects (reference here), I also believe the advanced movement of a human body comes from the human intelligence. Although the drone technology provided limited amount of success, my research related to Biped humanoid was very much a stand still. As such, I took a detour last few years focusing on various other AI technologies specifically on the Reinforcement Learning applications in the robotics. However, I recently run in to a Korean Roboticist who is working on building soccer playing robots. Unlike the wheeled soccer playing robots where the technology have advanced greatly during the last several years, soccer playing humanoid is still at an infant stage. The biggest huddle is to have the humanoid robot walk without falling down. It is true, despite of all the videos you see about the dancing robots from Boston Dynamics, rest of us are having hard time keeping it from falling down.
As you can see from the Youtube video above, it is a simple bare metal robot made of 3 hobby servos on each leg. There is a 3 axis gyro sensor on the robot’s torso that detects angular change from the side to side. Once the external force is applied to it, the robot compensates the push by momentally kicking out the leg on the same side. This counter action is enough to keep the balance and prevent the robot from falling down. Notice the robot’s foot is tiny, so the balance is all coming from the robot’s sensors.
This got me really inspired and I wanted to get my bipedal project back up and ultimately test out a newly learned theory (Thousand Brains theory by Jeff Hawkins; more in the future). I know this will be another long and grueling journey, so I am purposely going to go slow and steady. However, armed with the Dr. Hawkin’s new idea, I might be on to something this time. (Well, this is what I said about 10 years ago).
So I cobbled up my hobby servos and robot frames, this time using high torque servos just to make sure the robot have enough strength, built the lower half of the robot. Once some of the initial experiments are done to validate a few things I have in mind, I will be adding a servo with some weight on top to represent the weight of the upper body. Well, another 10 years. Let’s Go!
By the way, if you have not see it yet, here are some of the bipedal humanoids videos you must see. Maybe you might get inspired to start your own crazy projects.
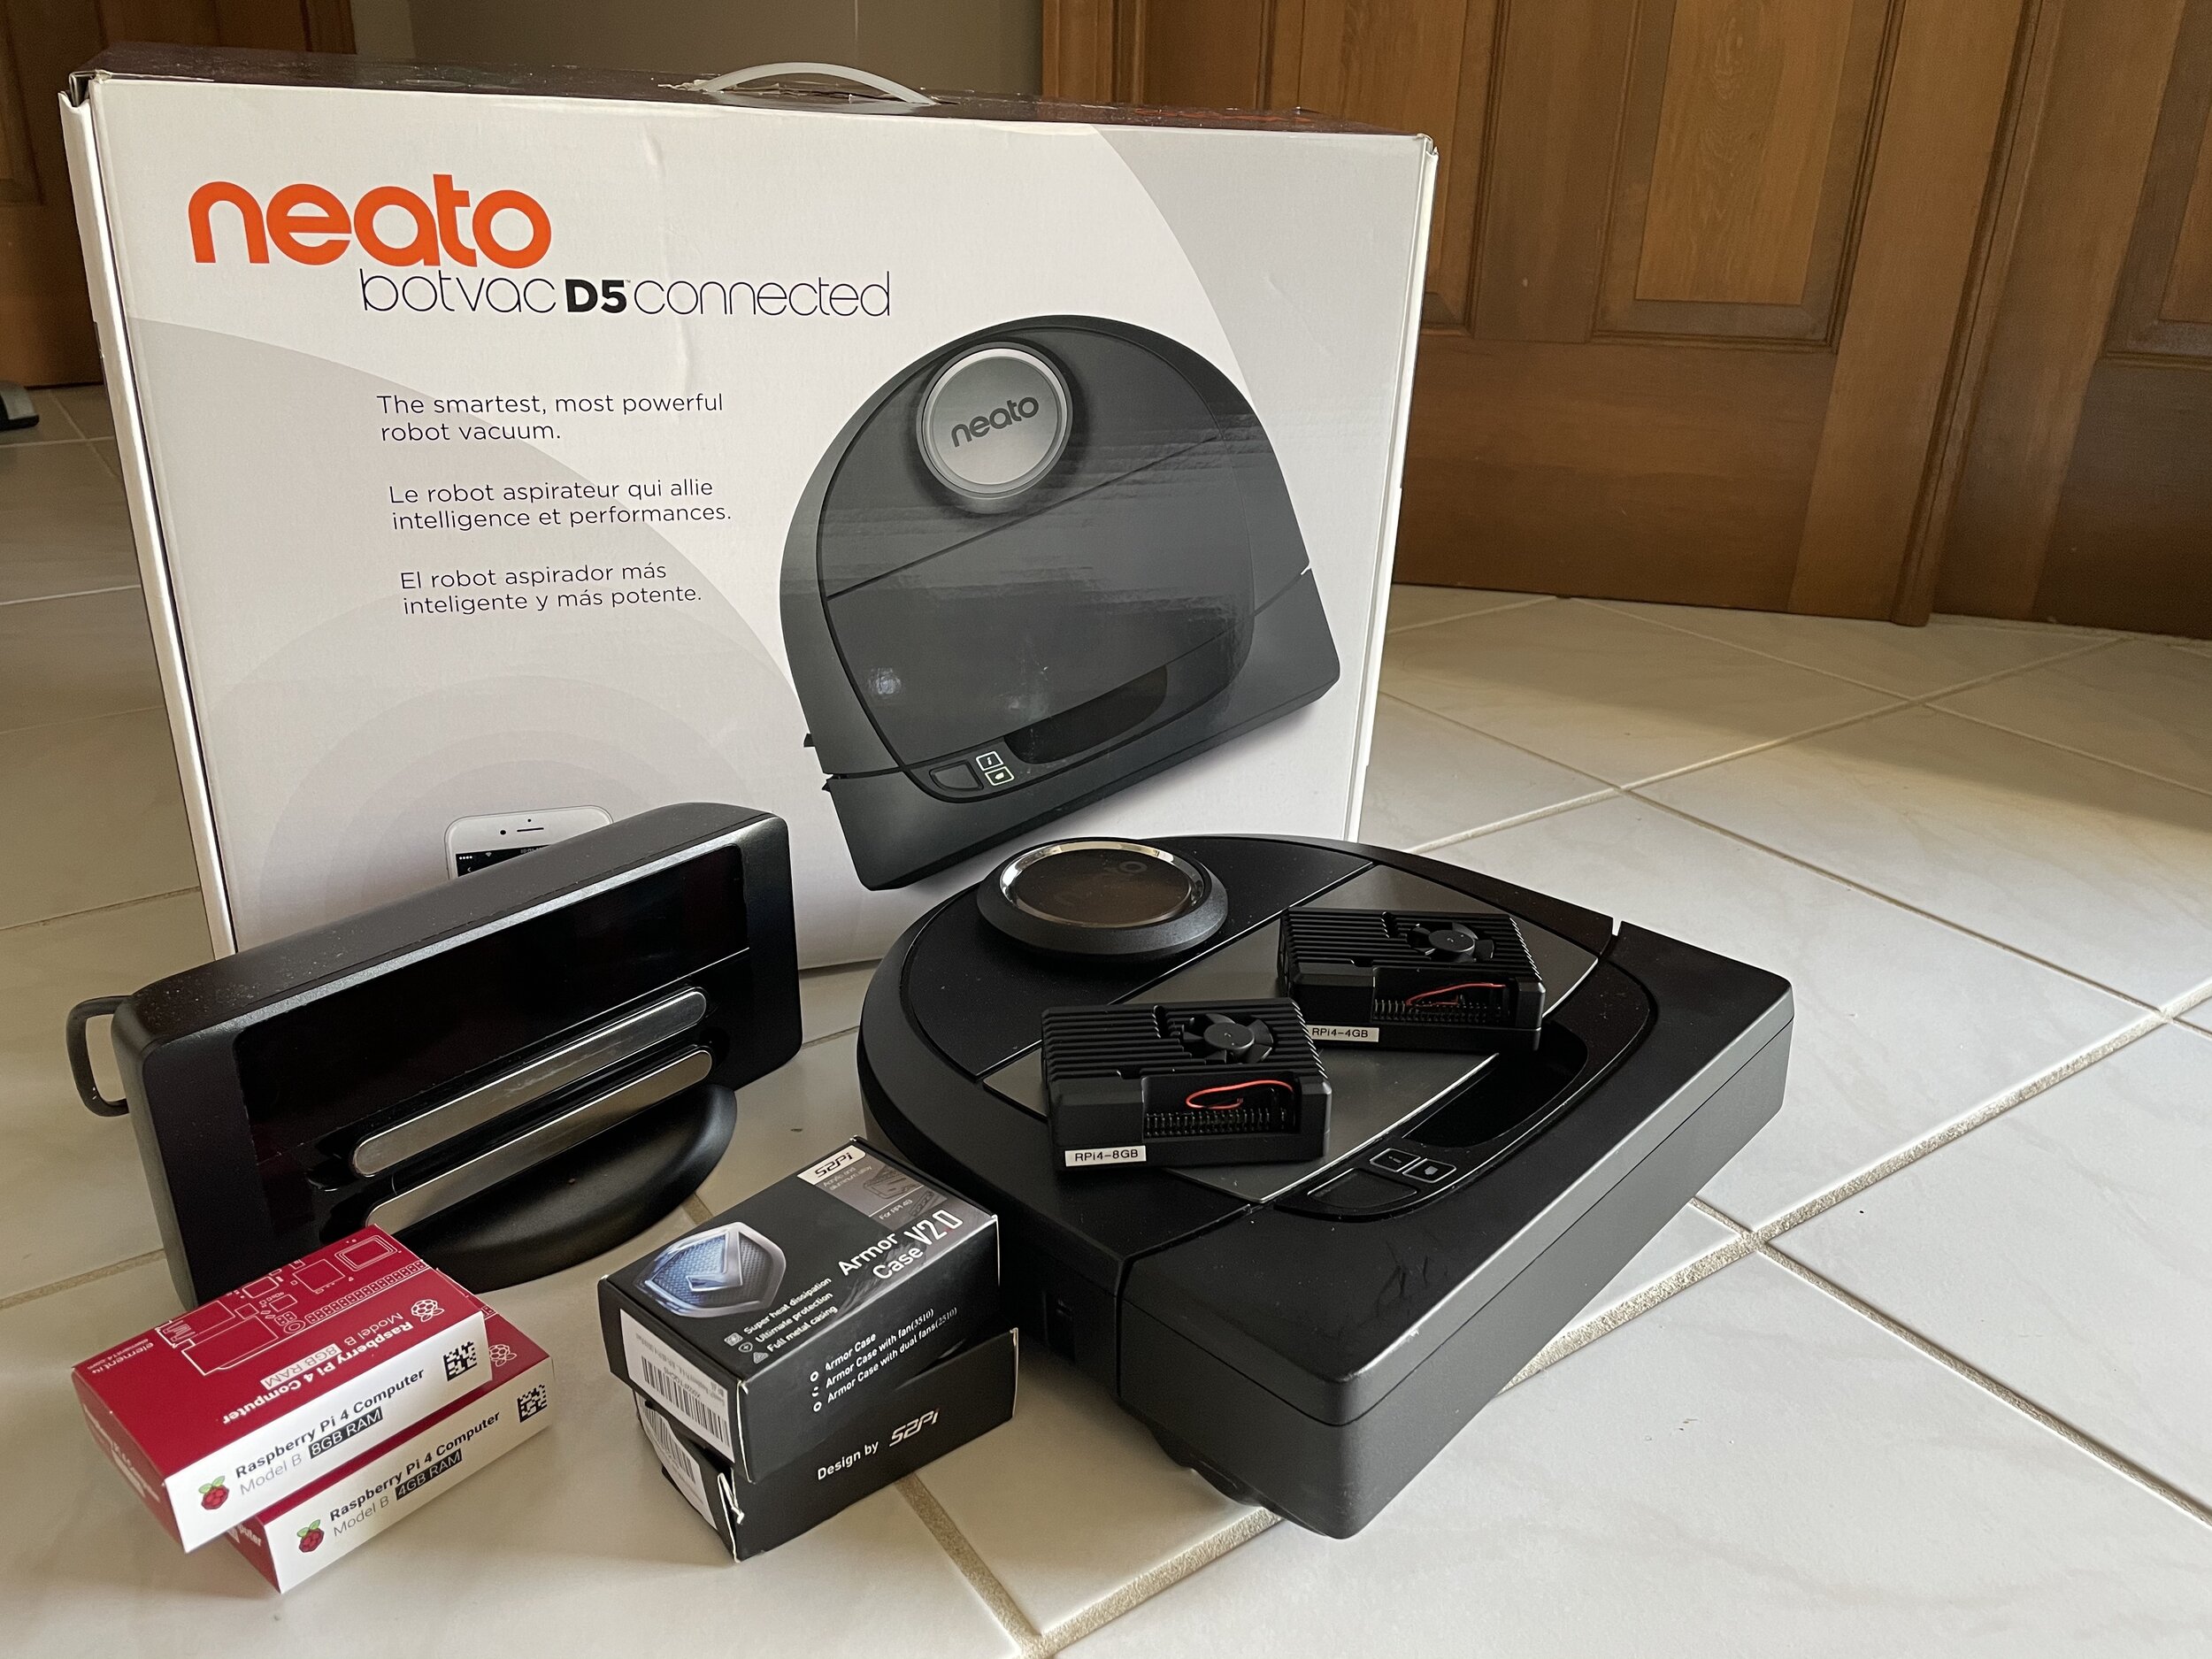
PROJECT: ROS2 Using Neato BotVac D5 Connected Robot & 8GB Raspberry Pi4
The blog post on Technology x2 details a project involving ROS2 (Robot Operating System version 2) and its application in a robotics project using the Neato BotVac D5 Connected Robot and a Raspberry Pi4 with 8GB RAM. The author discusses the advantages of ROS2, including improved module communication, Python3 support, and enhanced security. The project aims to enhance human-robot interaction with a focus on mobility, safety, and diverse communication methods. It involves customizing the Neato BotVac to house the Raspberry Pi4 and Arduino Mega, and setting up Linux Ubuntu with ROS2 on the Raspberry Pi4. The post also covers challenges and learning experiences encountered during the installation of ROS2 on the Raspberry Pi. For a detailed read, you can view the blog post [here](https://www.technologyx2.com/blog_hightech/2021/6/6/project-ros2-using-neato-botvac-d5-connected-robot-amp-raspberry-pi4-8bg).
Okay, after dabbling with the ROS2 (Robot OS version 2), I’ve decided to finally go all in with the ROS2. Although there are many benefits of using ROS, it is not a true Robot Operating System under the meaning of OS/Operating System. However, ROS now have a large and very active community behind it which is a big plus for the open source technology. Also, there are many reusable tools and libraries that are built on the ROS, which can significantly save time and especially if you or your engineering team lack the expertise in certain area. As for me, ROS (original ROS) helped me get started with some of my research projects by utilizing tools that were already developed and tested by the community without having me develop all the components and softwares myself. This allowed me to jump straight in to the area of my research without having to spend months building the robot and the base softwares.
As for the ROS2, it brings significant advantages such as how the modules (aka ROS nodes) communicate, support of Python3, and enhanced security. However, the difference between the ROS and ROS2 is significant enough where people who are proficient in the ROS or currently have an active ROS1 project was hesitant to change over. To me, this is somewhat like the time when the tipping finally happened with the Python3 and the remaining Python2 users had to bite the bullet. I see 2021 a year when the tipping is clear and majority of the ROS users will finally start making the move over especially with their new projects.

Unless I am pursuing a project simply to play around and test the technology, I normally try to envision where I want to go with the project and set the short-term and longer-term goals. Unlike many of my other robotics projects where I start from bare metal, I plan to use my ROS2 project purposefully designed to be shared with the ROS community and utilize the components and modules that are widely available. Also, the type of robots I want to focus during the next few years using the ROS2 will be largely on the “Human and Robot interaction”. This means the robot will have to be 1) Mobile in and/or outside the house, 2) Must be safe for human, animal, and properties, and 3) Need variety of ways to communicate and interact with human, animal, and household goods.
Keeping with this vision, I’ve picked up a used “Neato BotVac D5 Connect”. The Neato BotVac has the dirt bin that can be used to house my Raspberry Pi4 and MCU (for the micro controller unit, I will be using a good old Arduino Mega, but I may eventually jump over to the Teensy 4.1 due to it’s small size and the built in logging capability). The RPi4 is the model with maximum 8GB memory as I am almost certain that it will be a struggle trying to run ROS2 for SLAM and various other applications. RPi4 is housed in the “Armor case with fan” (reference my research page Here). The customized dirt-bin cover (metallic silver colored) was given to me by a good friend and a mentor. I would have been stuck without a cover after removing the dirt-bin.

Although the unit was in a very good shape, I did a through cleanup and removed all the vacuum parts that are not needed. As such, the space where the roller used to be is a nice empty space that is in the front and is open to the ground. It will be a great place to house various sensors and electronics.
Well.. a very good start as I have all the hardware for the ROS2 robot without having to build anything! Next step will be to install the 64-bit Linux Ubuntu + ROS2 on a SD card for the RPi4. I will also have to setup an old Dell laptop with a Linux + ROS2 to use as a controller system by SSH (remotely connect) into the robot’s Linux/ROS.
Planned Next Steps - Quickly get to a SLAM capable ROS2 Robot Platform
Download & burn Raspberry Pi4 image to a SD card - 64-bit Linux Server 20.04 - Done
I used 32gb class 10 SD card - perhaps I may move to 64gb later, but I like 32 as I can make a quick copy of the card (usually under 30min & retrieval is under 15min)
Configure Ubuntu 64-bit Linux Server - Done
Default Ubuntu ID & PW: ubuntu
Install instructions
Setup wifi on Ubuntu/RPi4: https://itsfoss.com/connect-wifi-terminal-ubuntu/
caution: when you nano to modify yaml fie, make sure you use 4 spacebar (using tab key will cause error).
Install ROS2 on the Linux image & test - WIP
I followed the github repo here: https://github.com/cpeavy2/botvac_node
other resources for reference: https://github.com/SV-ROS/intro_to_ros
Ran into an issue while trying to install a required packages: ros-foxy-xacro
sudo apt install ros-foxy-xacro <— unable to locate package error
Googling did not provide and answer, so the next step is to brute-force by installing the package manually
location for the xacro package - http://packages.ros.org/ros2/ubuntu/pool/main/r/ros-foxy-xacro/
*arm64.deb file can be downloaded to Linux (using curl -O command) & installed manually (I used gdebi as it automatically resolves dependencies) - https://linuxhint.com/manual_install_deb_package_cli_ubuntu/
As usual, nothing about computers are easy. I had to trace down and manually install a few additional packages.
first I needed ros-foxy-ament-index-python
which needed ros-foxy-ros-workspace
I used gdebi to install, ros-foxy-ros-workspace which satisfied the need for the ros-foxy-ament-index-python, which satisfied the need for the ros-foxy-xacro. You really don’t appreciate the automatic package install unless you have to manually do it yourself.
as I went down the manual installation route, I fell into the rabbit hole and started running into a bunch more package issues
we call this a Regression in the computer science when a previous state calls for another state and continues on - well, except in this case, it was the computer giving orders and I was the one who had to do the work
manually installed python3-colcon-package-selection, which was required by python3-colcon-parallel-executor, which was required by python3-colcon-powershell, which was required by python3-colcon-python-setup-py, which was required by python3-colcon-recursive-crawl, which was required by python3-catkin-pkg-modules……..
time to press the [Control] and [C] key and break out of this mess
while I was starting to get frustrated, a friend told me about the ROS GPG Key Expiration incident that happened about a week ago (see below).
ROS GPG Key Expiration Incident - ROS Discourse link HERE
to make the long story short, a mistake happened and it caused service outage on build.ros.org, build.ros2.org, ROS infrastructure, ROS buildfarm, ROS distro, packages.ros.org, and the Ubuntu key server.
Certainly I am impacted by this and to fix this issue, I need to update the public key used for ROS apt repositories using this command for ROS2
sudo curl -sSL https://raw.githubusercontent.com/ros/rosdistro/master/ros.key -o /usr/share/keyrings/ros-archive-keyring.gpg
As this simple exercise of getting the ROS2 installed on a Raspberry Pi, I am going to break this off into a separate posting. This way I can keep it updated and reference as I will surely fall back in the same trap in the future. Below is a few items for my own lessons learned
Nothing about computers are ever easy. Nothing about underpowered Raspberry Pi is easy. Needless to say, trying to put a 64bit Linux and a ROS2 (both rather new) on an underpowered RPi computer on a SD card is going to be troublesome.
Remember the Murphy’s Law! If it can go wrong, it will certainly go wrong ‘exponentially’. Bummer.
PROJECT: Remotely Control Arduino Robot Arm Using IMU Sensor over Bluetooth
The blog post on TechnologyX2 details a project for remotely controlling a 4DOF (Four Degrees of Freedom) Arduino robot arm using hand gestures. The control is achieved through an Inertial Measurement Unit (IMU) sensor which captures the hand's motion in x, y, z axes and transmits the movements to the robot arm over Bluetooth. Key components include a Lafvin Arduino Nano clone, HiLetgo HC-05 Bluetooth Master Module, HC-06 Bluetooth Slave Module, and a GY-521 MPU6050 3-Axis Accelerometer Gyro Module. The project emphasizes the importance of problem-solving in engineering, and the author shares insights and troubleshooting tips based on their experience in configuring and testing these components. For more details, you can read the full article [here](https://www.technologyx2.com/blog_hightech/2021/5/23/project-remotely-control-arduino-robot-arm-using-imu-sensor-over-bluetooth).

So I got started with my next Arduino robotics project based on a cheap bluetooth module and IMU sensors. Also, to stay true to the spirit of the project, I used an Arduino Nano clone and all the cheap parts you can buy from the internet.
If you decide to follow my project, there is a strong chance the exact same parts will not be available and the alternate parts choose will lead you to a new set of problems. This I think is a very important thing to learn as an engineer. I always have to remind myself this too - The skill of an engineer is to be able to “Think” and “To Solve Problems”. Engineering is all about solving problems. Being able to anticipate the unknowns and/or unexpected problems and build it into your project is a key part to a successful project. This means, doing proper research ahead of time, learning from your & other people’s mistakes, estimate your timeline and cost knowing some parts will go bad and need to be re-built/re-purchased. Through out my career, I’ve seen (and responsible for) too many failed projects due to bad planing and estimation. After that, the “Persistence” to stick to the problem no matter how impossible it seems and how frustrating it gets.
Day 1 - 5/23/2021
The goal of the project is to be able to “remotely control the 4DOF Robot Arm using hand gestures”. The approach I am going to take is to leverage the Inertial Measurement Unit (IMU) sensor to read the x, y, z axis movement data of my hand and send the movement command to the Robot Arm over the bluetooth.
The parts I ordered from Amazon arrived and it was time to get started.
Lafvin Arduino Nano clone - Link
HiLetgo HC-05 Bluetooth Master Module (this module can be configure as both master or slave) - Link
HiLetgo HC-06 Bluetooth Slave Module (this is a slave only module that is exactly same a the one that came with my Lafvin 4DOF Robot Arm kit) - Link
HiLetgo GY-521 MPU6050 3-Axis Accelerometer Gyro Module - Link
As a part of the process of starting a project, I started by testing the parts. During this process, I will also identify any specific configuration and/or modification requirements for the parts. As expected, I started running into the issues.
I normally don’t like giving a specific answer to a problem as I believe the learning/understanding can only come from an engineer finding and solving the problem themselves. However, in some cases, the barrier to entry is just too high or difficult preventing a learner from getting started. I figure this is the time when a handholding is most needed.
There are many reasons why an electronics or software projects will not go right. In fact, this is the case for majority of the projects and an experienced engineers learned to deal with the frustration and calmly keep pushing forward. Here are some of the things to check if you are having issues with uploading your sketch (program code) to the Arduino Nano clone.
Try selecting Board as “Arduino Uno” instead of Arduino Nano and try uploading the sketch.
This was the problem I ran into and following was a quick workaround to continue testing the board. After uploading a sketch with “Board: Arduino Uno”, I changed it back to “Arduino Nano”, and selected “Processor: ATmega328P (Old Bootloader)” and uploaded the sketch again. This made it work for now, but I will have to update the bootloader later.
Update: bootloader updated using the instruction - https://www.arduino.cc/en/Tutorial/BuiltInExamples/ArduinoISP
USB Driver issue or wrong processor
Other common Arduino Nano clone problems
Planned Next Steps - Work In Progress
MPU 6050 - setup and reading data - Done
Bluetooth HC-05 Master setup & connection test - Done
Align MPU data to the robot arm movement & test drive - WIP
PROJECT: Arduino 4DOF Acrylic Mechanical Robot Arm Kit

Some times it gets really tiring working on an impossible high tech project based on a new ROS2 framework and many of the new ML modules that is constantly breaking. As such, it often is a good idea to come back to the basics to ensure your understanding of the basic skills are solid (or in my case, painfully realize all the gaps in my understanding). I decided to pickup an inexpensive beginner’s kit that includes all the components so I can build it quickly and feel like a winner.
In case you are interested, below is the link and some of my initial thoughts about the kit. (click the picture or link here)

LAFVIN 4DOF Acrylic Robot Mechanical Arm Claw Kit Compatible with Arduino IDE DIY Robot with CD Tutorial - $37.99 at Amazon when I purchased it.
There are many kits that are very similar, so make sure to check the user rating/feedback before choosing one.
The main reason for me choosing this kit was because it included the joystick control and the bluetooth support.
It was one of the best cost/value at the time in Amazon.
Here is the very quick review of the kit and the lessons learned
The kit comes with an Arduino Uno clone and a sensor expansion board. The sensor expansion board (blue color) mounts on top of the Arduino board (black color). Having a sensor expansion board made it easier to manage wires as you can just plug in the 4 servo cables and a bluetooth module. Many seasoned engineers disregard it as unnecessary, but I alway see beginners struggle trying to manage all the basic wiring especially when they have to trace wires and debug something later.
CD that was provided included a PDF manual, Bluetooth app for Android based devices, and example codes for the Arduino. Unlike many of the cheap electronic kits you buy on the internet with no instruction, I found the PDF manual very useful in putting together the robot arm. However, you will still need some skills in building such electronic kits and should already have basic understanding of operating Arduino unit. There are many Youtube videos providing instruction on how to build a similar kit, but I still think a beginner will struggle if he or she tries to build it by himself/herself. This may make a good instructor led project where they can get some hands on help as needed (Note: as I have faced, the real learning will happen as the cheap components quickly go bad where you will have to find replacement part to fix or upgrade you robot).
It took me about 3 hours to build the kit and successfully run the first test code. I intentionally tried to build it as quickly as I can and use only the tools that was provided in the kit. Well.. just like building a plastic model kit, the cheaper the kit, more difficult and more skill that is required to build it. Needless to say, I made many mistakes including breaking some fragile plastic parts. Strongly recommend instructor led, but if you solo it, watch several Youtube videos on building a similar kit and use proper tools. Go slow and try to learn all the components as every part of this simple robot is what you will need to master as a robot engineer (or you will be like me, having to come back to learn all the basics that you skipped)
They provide all the components to build the kit like a small screw driver and a wrench, zip tie etc. However, I really struggled trying build it with what was provided (especially trying to tighten many screws with a tiny screw driver and a tiny wrench - stop and get yourself a good set of tools). Also, the acrylic (plastic) parts were much fragile than I expected. Be careful pulling apart all those small and thin pieces. As I rushed, I cracked a few thin pieces that was weight bearing - it later broke off when I ran the robot.
The servos needs to be aligned to the center (90 degrees) position when you put it together. Having a servo tester is a good idea. However, this is something you will not be able to avoid regardless of how much experience you have. I encourage you to make this mistake - just don’t get too frustrated and never give up. Building a robot means, you will have to rebuild that same robot many many times. Initially to fix your mistakes (like misaligned servos), but later to optimize and improve your robot’s performance. Never give up & keep learning!
Day 2 - 5/11/2021
Well, day 2 of the project. As I always over-engineer everything, I already ordered a few programmable master/slave bluetooth modules and a few IMU sensors (Inertial measurement unit - similar to the sensors in your phone to detect which way the phone is moving etc.) so I can remotely control the robot arm using a separate Arduino controller. Why I always make a “simple and fun” project into some impossible never ending project, I have no idea…. hopefully, I use this opportunity to really understand the bluetooth communication modules and the way IMUs work.
After getting the robot built and run the initial test code to ensure the robot was working, today’s objective was to implement all the external control mechanisms. The video above shows the external joysticks to move the robot arm. The servos have good torque and the movement is very snappy. I like the fact that the robot can be driven by the 5V power supplied to the Arduino board via USB for a single servo operation. I may need an additional power source only if I do movement that requires simultaneously servo movements. After a few hours of stress testing it using some set movements, the claw servo is starting to show problem (not responding quickly).
Okay last test for the day. I was able to implement the bluetooth module on the robot and remotely control it using the Android application that was provided. So it took me two nights work to get everything implemented and tested. However, did you see something dangling from the claw? It is one of the part that was cracked and finally broke off. Also, I managed to burn out the claw servo (not working at all now) and stripped the second servo that raises the arm. Did you hear the robot/servo screaming at me when I raised the arm up?
A little break until the IMU sensors, Bluetooth modules, and the replacement servos arrive.
Day 3 - 5/13/2021
The bluetooth modules and the IMU sensors I purchased arrived. While I spent most of my evening reading up on the IMU documentation and doing some Youtube research, I found these videos that will be very helpful to anyone who wants to start similar project.
This is not the same kit I used. However, the components are very similar except mine was made up of cheaper components like Arduino clone etc.
This video talks about the same issues I’ve encountered like the cracked parts while building, claw servo burning out (it is really funny that he has the part dangling just like I had in my video above), and other issues.
If you plan to use this as an educational tool, these issues are not to be avoided. These problems will provide an excellent opportunity for the young engineers to reflect on what they have not considered, determine how to overcome (e.g. make vs buy replacement parts or better yet, modify the design to avoid the persistent problems from coming back again). Instructor should provide them with a safe environment for them to fail, learn to work together especially during difficult times encourage each other to bring out their strengths. I really do believe these are some of the essential skills that is a par of engineering.
I’ve also included two videos above that I think will help you in building the hardware of the robot
As usual, I am doing the learning “after” I’ve already made all the mistakes. Hopefully, you are much smarter than I am, but I still will encourage you to make these mistakes and learn the “art” of overcoming your failures. Good luck and Never Give-up!
Planned Next Steps
Mount robot arm on a platform and add IO (LCD display + Button) - Done
Configure min & max of the movement and add safety functions - Done
Program display menu structure - Done
Add RGB LED (NeoPixel) and code lighting functions - Hold until later
Choosing between the ROS 1 and ROS 2 - For Dummies Guide for choosing Robot OS

Once you decide to learn ROS (Robot Operating System), next step is to choose between the ROS 1 or ROS 2. There are many resources on the internet that highlights the difference between the ROS1 and ROS2. Following is an excellent article that compares the difference between the two using infographics. As you can see in the article, both ROS1 and ROS2 serves as an excellent platform which contains re-usable tools that will help you develop your robotics projects. They are both backed by a very active and passionate community of roboticists all over the world.
“ROS 2 vs. ROS 1 Which One Is Better For Me?” - https://www.theconstructsim.com/infographic-ros-1-vs-ros-2-one-better-2/
Before we continue, let me make it clear that the ROS2 is not simply a next version of ROS1 - ROS2 is very different than ROS1. Even thought I would agree that the ROS2 includes very important improvements over ROS1, the difference between the two often feels like they are two different OS like Windows OS vs Mac OS. At times, your experiences in ROS1 will hinder your learning of the ROS2. So, the important question is should you start with the ROS1 or ROS2 as a newcomer to the RobotOS. The natural tendency is to start with the later version which is the ROS2 simply because you want to avoid having to learn an older platform which will be deprecated soon. The decision is not that simple.
Consideration for starting with the ROS2 - Engineering is hard and the robotics is harder. While pursuing a robotics project, there will be many times that you will run into problems that you need to research on the internet for and even seek help from the ROS community. As of this writing, mid 2020, the resources and code examples in ROS2 is still rare compared to the more established ROS1. Also, receiving help from the ROS community maybe limited to certain popular topics due to the people in the ROS community still new to the ROS2. The viable reason to start with the ROS2 first is, if it offers the key functionality that you must have in your project such as security requirement, language or platform support, and number of communication nodes required etc. Keep in mind, the road to the ROS2 will give you more capabilities at the end, but the road will certainly be slower and tougher at least for now.
Consideration for starting with the ROS1 - Many people who have some experience in the ROS1 and have dabbled on the ROS2 will likely recommend starting with the ROS1. This is due to the vast amount of resources that you can easily find and reference for your project. You will also be able to find learning materials like books, on-line courses, tutorial much easily and cheaper with the ROS1 (please reference my other post on the ROS for a free ebook by Mr. Jason M. O’Kane - https://www.chibots.org/content-how-to-advanced/getting-started-with-the-ros-robotos ). Although starting out with the ROS1 will provide less painful start, you will soon find yourself envious of the capabilities of the ROS2 and regret not starting with the ROS2.
The key to your success is Getting Started - The more you wait and the more you search, you will just end up with more contradicting recommendations. To add to your confusion and frustration, my recommendation is to start with the ROS1 if your objective is to learn ROS. You will enjoy vast amount of free resources on the internet and the support from the ROS community. If you are pursuing a robotics project that must have the capabilities offered by the ROS2, start with the plan in mind that you will have a lot of learning and R&D along the way. Just like the old saying, there is really no secret and the key is to get started and find out the answer yourself. After all, the reality is that you will end up having to learn both, realizing that there was no shortcut.
I will end my post by sharing my previous journey of learning Python back in 2012ish. Coming from the old C/C++ language, everyone said picking up Python was going to be really easy. When I got started, the Python 2 was the old and more established version and the Python 3 was the new and radically improved version very similar to the ROS1 vs. ROS2 today. Thinking that I can skip the Python2, by going straight to the Python3, I got started by buying an only book at the bookstore on Python3 that costed more than my computer (well at least it felt like it). Unlike what I have expected, learning Python for me took much longer than I have initially thought. Also, whenever I try to push my project beyond the basics of the book’s tutorial, I found myself constantly getting stuck with not being able to find much on the internet (also, online communities like StackOverflow was still very new at the time). Also, because of many open source projects were predominantly written in Python2, I found myself spending more time on Python2 rather than Python3 unless it was for my own project written in 3. Needless to say, I eventually got pretty good on Python, but perhaps the time and pain would have been less if I focused on Python2 first rather than having to learn both Python2 and 3 unintentionally in parallel. As in life, I think there is no shortcut in technology. The key is to get started - You will eventually become a master as long as you don’t give up! I promise.
Getting Started with the ROS (Robot OS)

TurtleBot3 by Robotis - ROS
Among the roboticists, both hobbyists and professionals alike, the ROS (Robot Operating System, https://www.ros.org/) is rapidly becoming one of the major robotics platform for building and driving robots. Some people will argue that the ROS is not exactly an Operating System, as it is a platform or a collection of tools that runs on a Linux OS. Despite of how you categorize it, the true power of ROS comes from the active ROS community and the community developed open-source softwares and middle-wares that are re-usable.
Before the ROS, a roboticist would spend countless hours reinventing the wheel each time they start a new project. One of my biggest frustration coming from the software engineering, is the lack of standardized conventions for driving hardware functionalities. To build a simple 5 axis manipulator aka Robot Arm, I find myself spending considerable amount of time and effort learning about the individual hardware components and its embedded softwares. As the robotics require advanced skills in multiple domains including mechanical engineering, electrical engineering, and software engineering (and nowadays Machine Learning, Computer Vision etc.), it is most likely that a robotics project will get stalled before you get to the point where you start thinking about programming the robot to move. Needless to say, that the small research project involving inverse kinematics of a robot arm, is not a small project due to the hidden obstacles and barriers coming from the multiple domains of expertise that are beyond most of us.
ROS as a meta-operating system provides process management and hardware abstraction. This means, you can re-use the thousands of hardware and software components that are already built by the ROS community and focus in the area of your expertise. Think of it as getting access to various Arduino libraries that extends the functionalities of your sensors without have to write it yourself. ROS is especially helpful for driving advanced components and/or very specific use cases. I think the ROS provides the best opportunity to leverage what other have already built and to share what you have built with the others.
There are lots of resources available on the internet and the bookstores. One of the resources I would recommend starting out is the “A Gentle Introduction to ROS” by Mr. Jason M. O’Kane - https://www.cse.sc.edu/~jokane/agitr/ . The book is free for individual use and is highly recommended by the ROS community. Why not give ROS a try? It will certainly be a great tool to have in your robotics toolkit.
RESEARCH: Best Raspberry Pi 4B Case (Optimized for Makers and Hackers)
The new Raspberry Pi 4B was introduced in June 2019 with the choices of RAM of 1GB, 2GB, and 4GB. As of March 2020, 4GB and 2GB models were a runaway success despite of relatively higher price point compared to the previous $35 price point for a Rpi. Rpi 4B 1GB model was the entry point, but it did not show a clear distinction between the previous Rpi 3B+ model which has slightly slower CPU and same size RAM (well.. actually, 4B model had Gigabit ethernet which was big). Later Rpi 4B 1GB model was discontinued and the price point of the 2GB model was lowered to $35 as a new entry point.
Due to the faster CPU (and overclock option), faster ethernet, and more RAM, the Rpi 4B models were reported to have overheating issues. I wanted to find a rugged case that offered passive cooling as well an active fan cooling option as my use case for these 4B models require more computation. Following are a few cases that I ordered from the Amazon.

iUniker Raspberry Pi 4 Case, CNC Metal Case Aluminium Alloy, Cooling Heatsink for Raspberry Pi 4 Model/Pi 4
https://www.amazon.com/gp/product/B07ZQ2F6DB/ref=ppx_yo_dt_b_asin_title_o08_s00?ie=UTF8&psc=1
PROS: A solid/heavy metal case that enclose the entire Rpi unit. Kind of feels like a solid bar of soap. Passive cooling works well for my Rpi 4B 1GB model running light tasks.
CONS: No direct access to the GPIO pins without opening the case (however it does have openings to run cables out of the case). Passive cooling might not be enough for computational intensive tasks that will create lots of heat over a long duration.
Conclusion: I really like the solid feel of this case with no moving parts to break as my use case will be to carry it around in my project case to drive my electronic projects/demos.
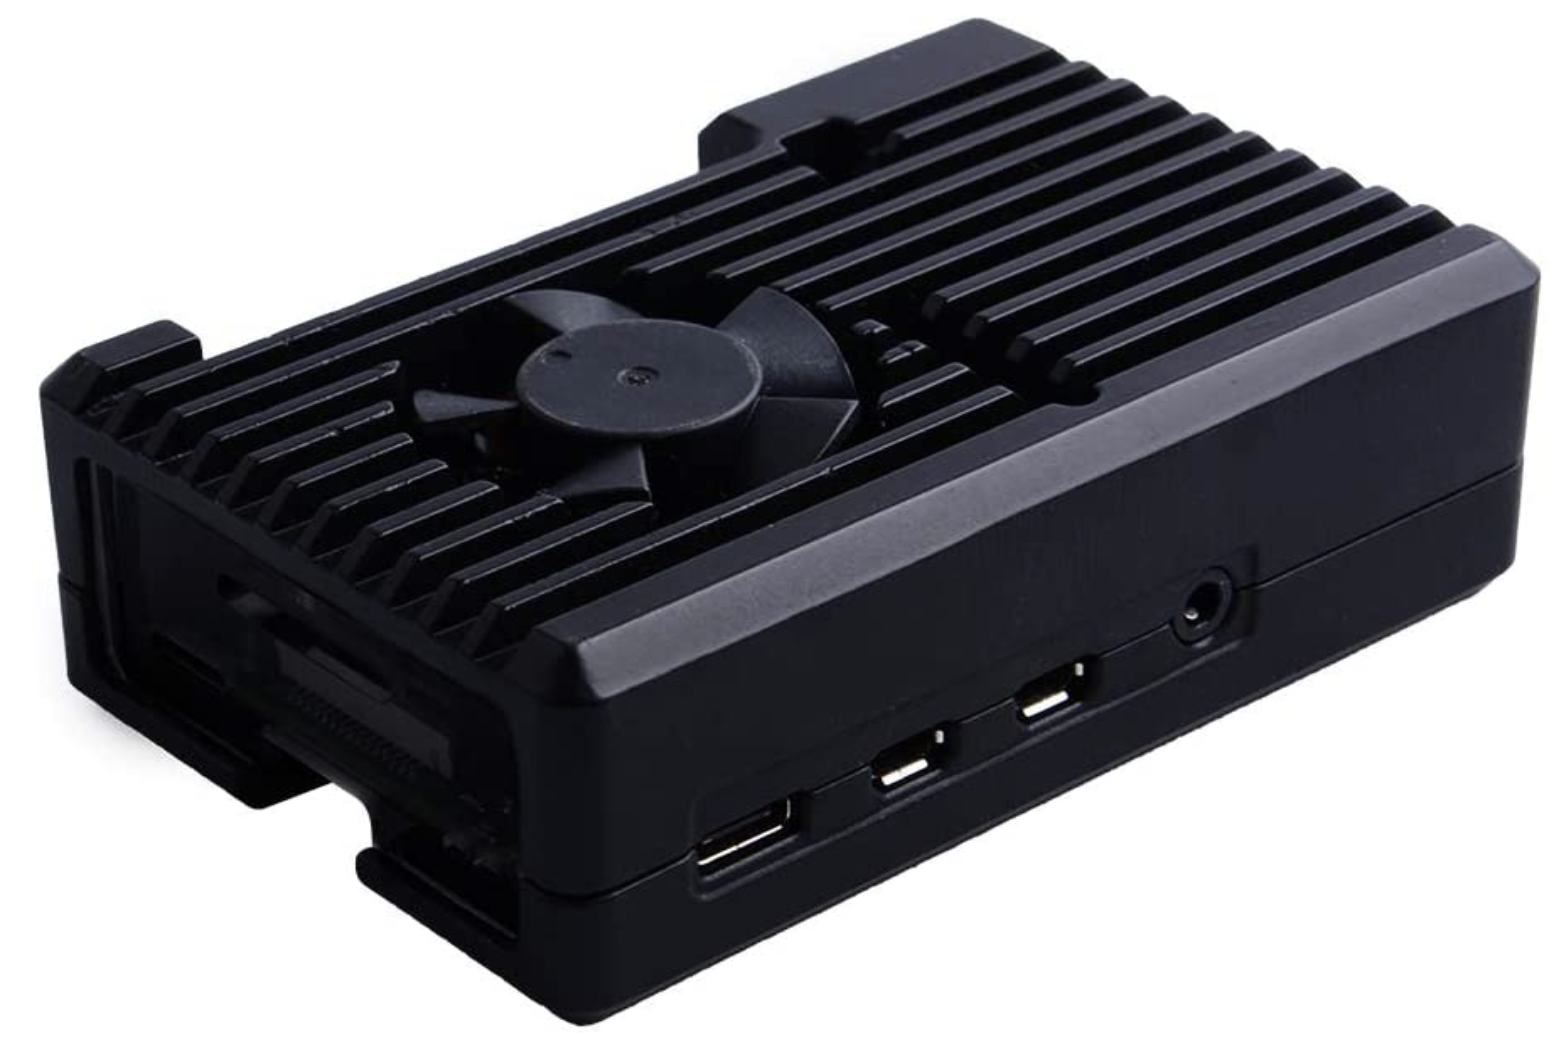
GeeekPi Raspberry Pi 4 Model B Armor Case with Fan, Passive Aluminum Alloy Case with Cooling Fan (3510 Fan)
https://www.amazon.com/gp/product/B083XV78RD/ref=ppx_yo_dt_b_asin_title_o08_s01?ie=UTF8&psc=1
PROS: A solid/heavy metal case with a fan to provide active cooling. This unit feels like the passive cooling unit described above. The fan was very quiet and the case remained cool after running YouTube for an hour on my 2GB unit. GPIO pins are accessible for the frequent use.
CONS: No cover or protection for the accessible GPIO pins.
Conclusion: I really like this solid case that provides both passive and active cooling. Having access to the GPIO pins make it a great unit to carry around to drive my electronic projects and demos that requires GPIO access. If I have to pick one for portable use, this will be my pick for my use case.

Argon NEO Raspberry Pi 4 Model B Heatsink Case, GPIO and PoE Pins are Accessible
https://www.amazon.com/gp/product/B07WMG27T7/ref=ppx_yo_dt_b_asin_title_o02_s00?ie=UTF8&psc=1
PROS: WIP - Awaiting delivery
CONS: WIP - Awaiting delivery
Conclusion: WIP - This one is very stylish passive cooling case which provide access to the GPIO pins. Compared to the first one which has the fins (heat sink), this one may not be as effective in cooling the unit. I will have to try it out when it arrives.

Argon ONE Raspberry Pi 4 Model B Case with Cooling Fan and Power Button
https://www.amazon.com/gp/product/B07WP8WC3V/ref=ppx_yo_dt_b_asin_title_o05_s00?ie=UTF8&psc=1
PROS: WIP - Awaiting delivery
CONS: WIP - Awaiting delivery
Conclusion: WIP - This one is highly rated due to the stylish case with active cooling fan, access to the GPIO fan, and Rpi In/Out ports all routed to the back of the unit. I plan to house my 4GB unit that will stay at my lab, so the form factor works well. I will have to try it out once it arrives.
WORK IN PROGRESS BELOW—————————————————————
Workaround for a Raspberry Pi not working on some HDMI (e.g. connecting to Samsung TV)
Note for Raspberry Pi4B
because Rpi 4B now has two HDMI ports, HDMI commands now can be applied to either or both ports. Syntax is <command>:<port>
Port 0 is default (if no port is specified, the default is set)
Once your uncomment the #hdmi_safe=1 (to have the Rpi’s HDMI to work with most types of displays), you may have the situation of the picture from both port 0 and 1, but sound only from the port 0. This maybe a bug that is not configured to apply to sound in port 1 (which is new as of Rpi 4B).
Additional reference
Issue with Raspberry Pi 4B connecting to wifi 5Ghz
I was able to connect to 2.4 GHz with no issue, but 5GHz will not connect my Rpi even though I was able to see the SSID. After messing around, I tried to re-image the OS to the SD card again and re-installed the OS.
I was using Raspbian OS Buster - I was being careful with the initial setup especially with the wifi configuration (only configured using 5GHz). It did not see any SSID during the initial setup, but was able to manually select the SSID (it did see both 2.4 & 5GHz) and enter the passphrase. Initially, I had issue with the connection being made and getting disconnected. After a while, the connection was maintained.
As the 5 GHz range is shorter than 2.4 GHz, I am assuming the issue has to do with the 5 GHz channel with my router. The situation probably was worsen with the heavy metal ‘passive + fan cooling’ case I have on this Rpi 4B with 2GB. I will have to see if this issue returns.
Safe Shutdown button
I never really liked using software/script based shutdown button due to the instability/reliability of its functionality. However, I wanted to have this simple shutdown button for the prototypes I will be building that will be used by many users.
PROJECT: RetroPie - Retro-Gaming on the Raspberry Pi (2020 Update)
WORK IN PROGRESS
The update to the new RetroPie OS and the NESPi Case+ is complete
However, new RetroPie OS based on Raspbian Buster (beta) just got release - So I will have to test the new version
PROJECT: 2020 Update of the RetroPie - Retro-gaming System
Case used: NESPi Case+ (note: + model supports power shutdown)
Gamepad: Logitech Gamepad F310
RetroPie OS: 2017 version was outdated and the lastest March 2020 version was installed.
Coming Soon : Lessons learned for the install etc (+ Buster based OS as well)
Retropie ROM
MASTER CLASS: Mr. Masahiko Yamaguchi (aka Dr. Guero)

Mr. Masahiko Yamaguchi at the 2011 International Robot Exhibition, Tokyo Japan
“I am interested in artificial intelligence, and in that context, I think intelligence and skills have equal value. So my purpose in creating this robot was to pursue intelligence from the skills perspective.”

One of my heroes of the Bipedal Humanoid is Mr. Masahiko Yamaguchi (aka Dr. Guero, Youtube). Hi’s research on balancing robot is simply amazing. Access to his work by the English speaking audience is only limited through the awful internet translation services. As the modest nature of a Japanese culture and introverted temperament of a technologist, I doubt he will ever PR himself on the internet. I wanted to dedicate this page to share some of the greatest work done by Mr. Masahiko Yamaguchi.
Blog in Japanese - http://ai2001.ifdef.jp
Youtube channel - https://www.youtube.com/user/DrGuero2001
Tamagawa Seiki demo at 2011 iRex, Tokyo Japan - https://youtu.be/mT3vfSQePcs
Demo of the Stilts Robot, 5th ROBO-ONE on PC - https://youtu.be/B5T2httvnCk
Who is Dr. Guero?
Name: Masahiko Yamaguchi
Current Residence: Shizuoka, Japan
Nickname: Dr. Guero (The nickname was given by his wife who is a big fan of popular Japanese anime Dragon Ball. Dr. Guero is an evil genius robot inventor who was the master mind behind the RR army. Perhaps it is a fitting nickname since the husband is alway working on robots and is rarely available to help with the housework.)
Significance of 2001 reference in your ID? - It is a reference to the favorite move “2001: Space Odyssey”
Robotics Research:
Currently being pursued as an independent research. I wanted to work on the full-size humanoid or a robot that can be deployed to a real work environment such as a robot to operate in the Fukushima nuclear disaster site. Independent researchers have various difficulties including micro budget usually funded by themselves, and the limitation of equipments/tools and certain skills to build the robot. For this reason, the release of a successful robots are far and far between (based on a forum post in 2013).
Limitation of small humanoid robots:
Characteristics of the servos used in the robot plays a big part; difficult to calculate exact tolerances level from the movements; difficult to process calculations of the mechanical motions of a rapid movement such as dynamic walking
Why focusing on the Bipedal Humanoid?
The approach of the bipedal humanoid requires pursuit of rationality and enhanced logical understanding of human which allows us to develop more useful robots
Robotics is a convergence of various technical disciplines (electrical, mechanical, and software)
My goal is to get to the AI via the use of robotics (based on the forum post in 2015).
Thoughts on consciousness
I think the brain contains something that is "non-computational" which cannot be replaced by symbolic logic.
Work In Progress - Translation of the Dr. Guero Blog
Translation of the main Blog page (done - button/link above)
Translation of the subpages/detail pages (started, but it will take a long time due to the complexity of the topics and the expertise required to understand the material)
PROJECT: INNFOS GLUON - Modular Desktop Robotic Arm (KickStarter - SUSPENDED)
Innfos Gluon - 6DOF
FINAL UPDATE:
I bid on this Kick Starter project to help me with a robot arm research project.
I’ve really liked the build quality and the modularity of the robot despite the lack of availability of the SW tooling.
This Kick Starter project ended up getting cancelled. All the backers got our money back, but I had to also cancel my Gluon Robot Arm research project.
GLUON is an innovative creation. This robotic arm can perform much more complicated actions without being bulky and expensive. INNFOS integrated motor, drive, encoder and reducer in an all-in-one design jazzed-up actuator that created GLUON. The smart compliant actuator is called INNFOS SCA that breakthroughs the old limits of service robotic industry.
KickStarter Link - https://www.kickstarter.com/projects/1383636492/the-smallest-servomotor-robotic-arm?ref=discovery&term=robot
Gluon 6-Axis | Early Bird - Pledge $759 or more
Get your Gluon 6-Axis Robotic Arm DIY Kit at a better price! Save $540 off the retail price.
Funding Close December 26, 2019
Includes: 6-Axis Robotic Arm DIY Kit
Estimated Delivery: Jun 2020
INNFOS GITHUB PAGE

Kickstarter Update: As of January 2020, the project was suspended & the backing was refunded

Robot Arm - PROJECT VISION & GOALS
VISION
TBD - No clear vision at this time. Research Phase.
GOALS - 2020 (planned to use Innfos Gluon 6 DOF Robot Arm)
Suspended - Robot Arm use case in production
Suspended - ROS implementation of Robotic Arm
Suspended - Simulation & Machine Learning use case
Suspended - Apply Inverse Kinematics - Robot Arm Frame
GOALS - 2021
Completed - Back to the basics - Simple Arduino 4DOF Acrylic Robot Arm Kit
WIP - Implement advanced functionalities to the 4DOF Robot Arm
Spitfire EV Project - Ending the body restoration phase
The blog post on TechnologyX2 details the progress of the Spitfire EV Project, focusing on the completion of the major body restoration phase. The author describes the meticulous process of removing layers of old paint, repairing dents, and applying a protective epoxy primer/sealer to the bare metal. This phase sets the stage for future work on the car's electronics and internals. The post emphasizes the importance of taking time in restoration to learn and acquire skills, along with the enjoyment of sourcing original replacement parts. The next steps include focusing on the car's electrical system and integrating both digital and classic elements into the design.
For more detailed information, you can read the full blog post [here](https://www.technologyx2.com/blog_hightech/2019/10/8/spitfire-ev-project-ending-the-major-restoration-phase).
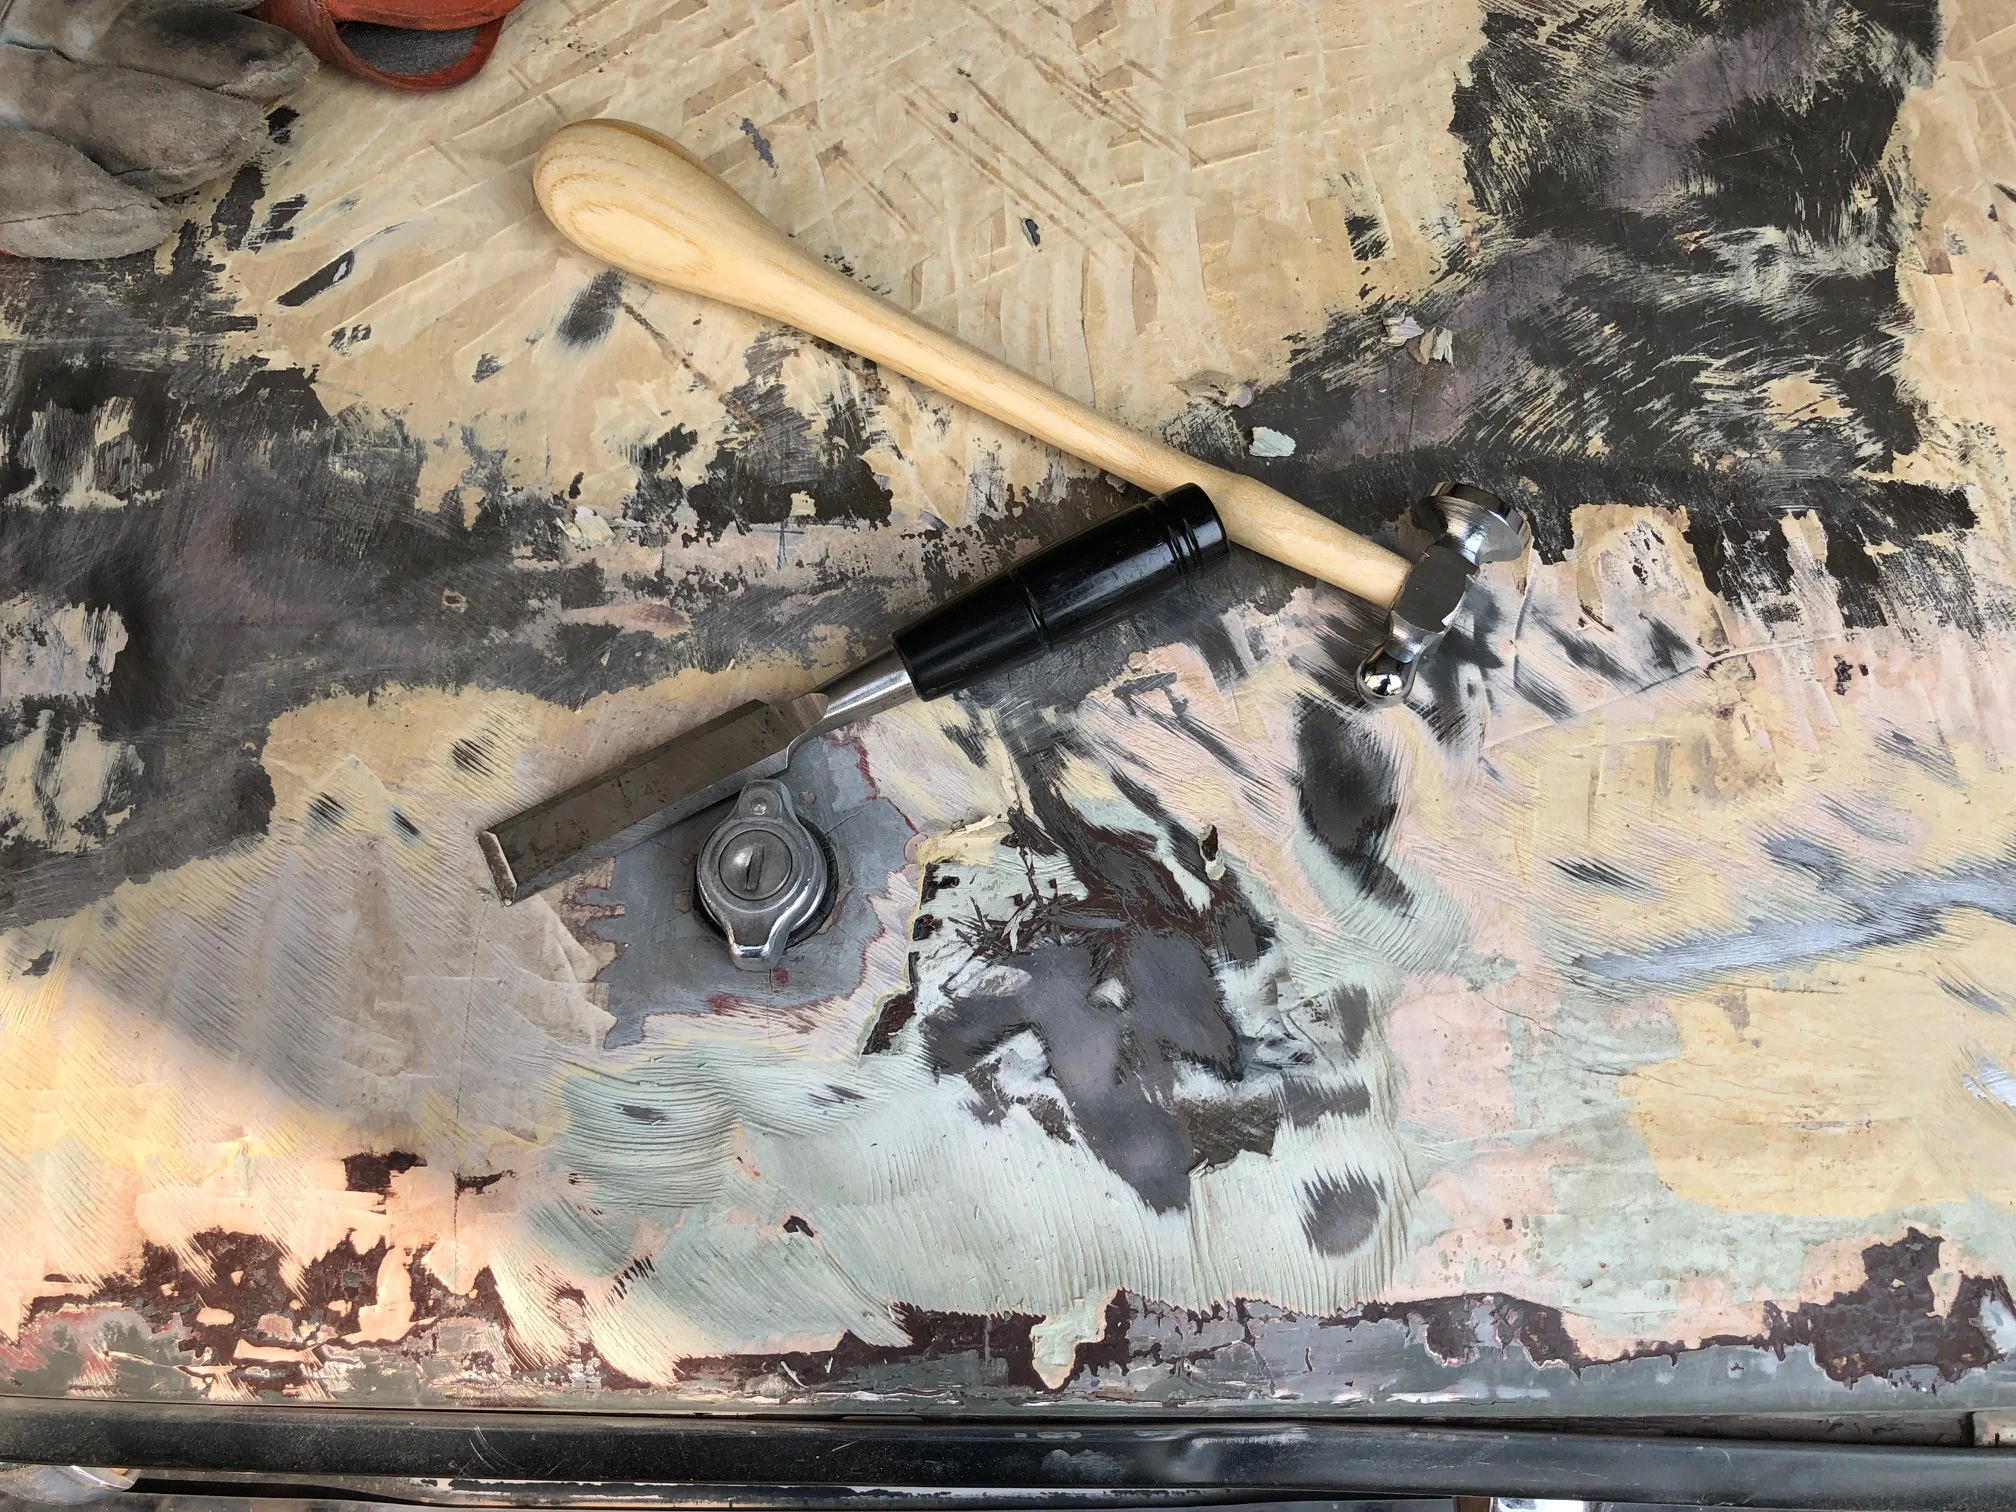
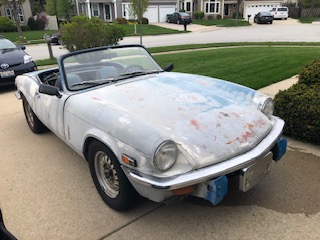
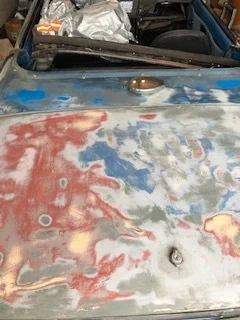
With the weather getting a bit cooler, I’ve pushed forward and made a progress with the body work. Several layers of old paints scraped down to the bare metal, many hours of hammer and dolly work, and stud welder to pull out the nasty dents. Moving slowly and doing a good job here will pay off when I get to the final phase to lay down the color and protective coats.

Down to the bare metal and the hardware removed.

A few more spots to sand off.

Polished metal signify the end is near.
I think it is really important for the bare metal to get a good protective seal with the Epoxy Primer/Sealer. It seals the work that is performed between the job for the weekend warriors. As for me, it will serve as a nice protective layer while I work on the ‘electronics/internals’ of the car, allowing me to come back next spring/summer to work on it again and finish it off with the filler and final color paint.
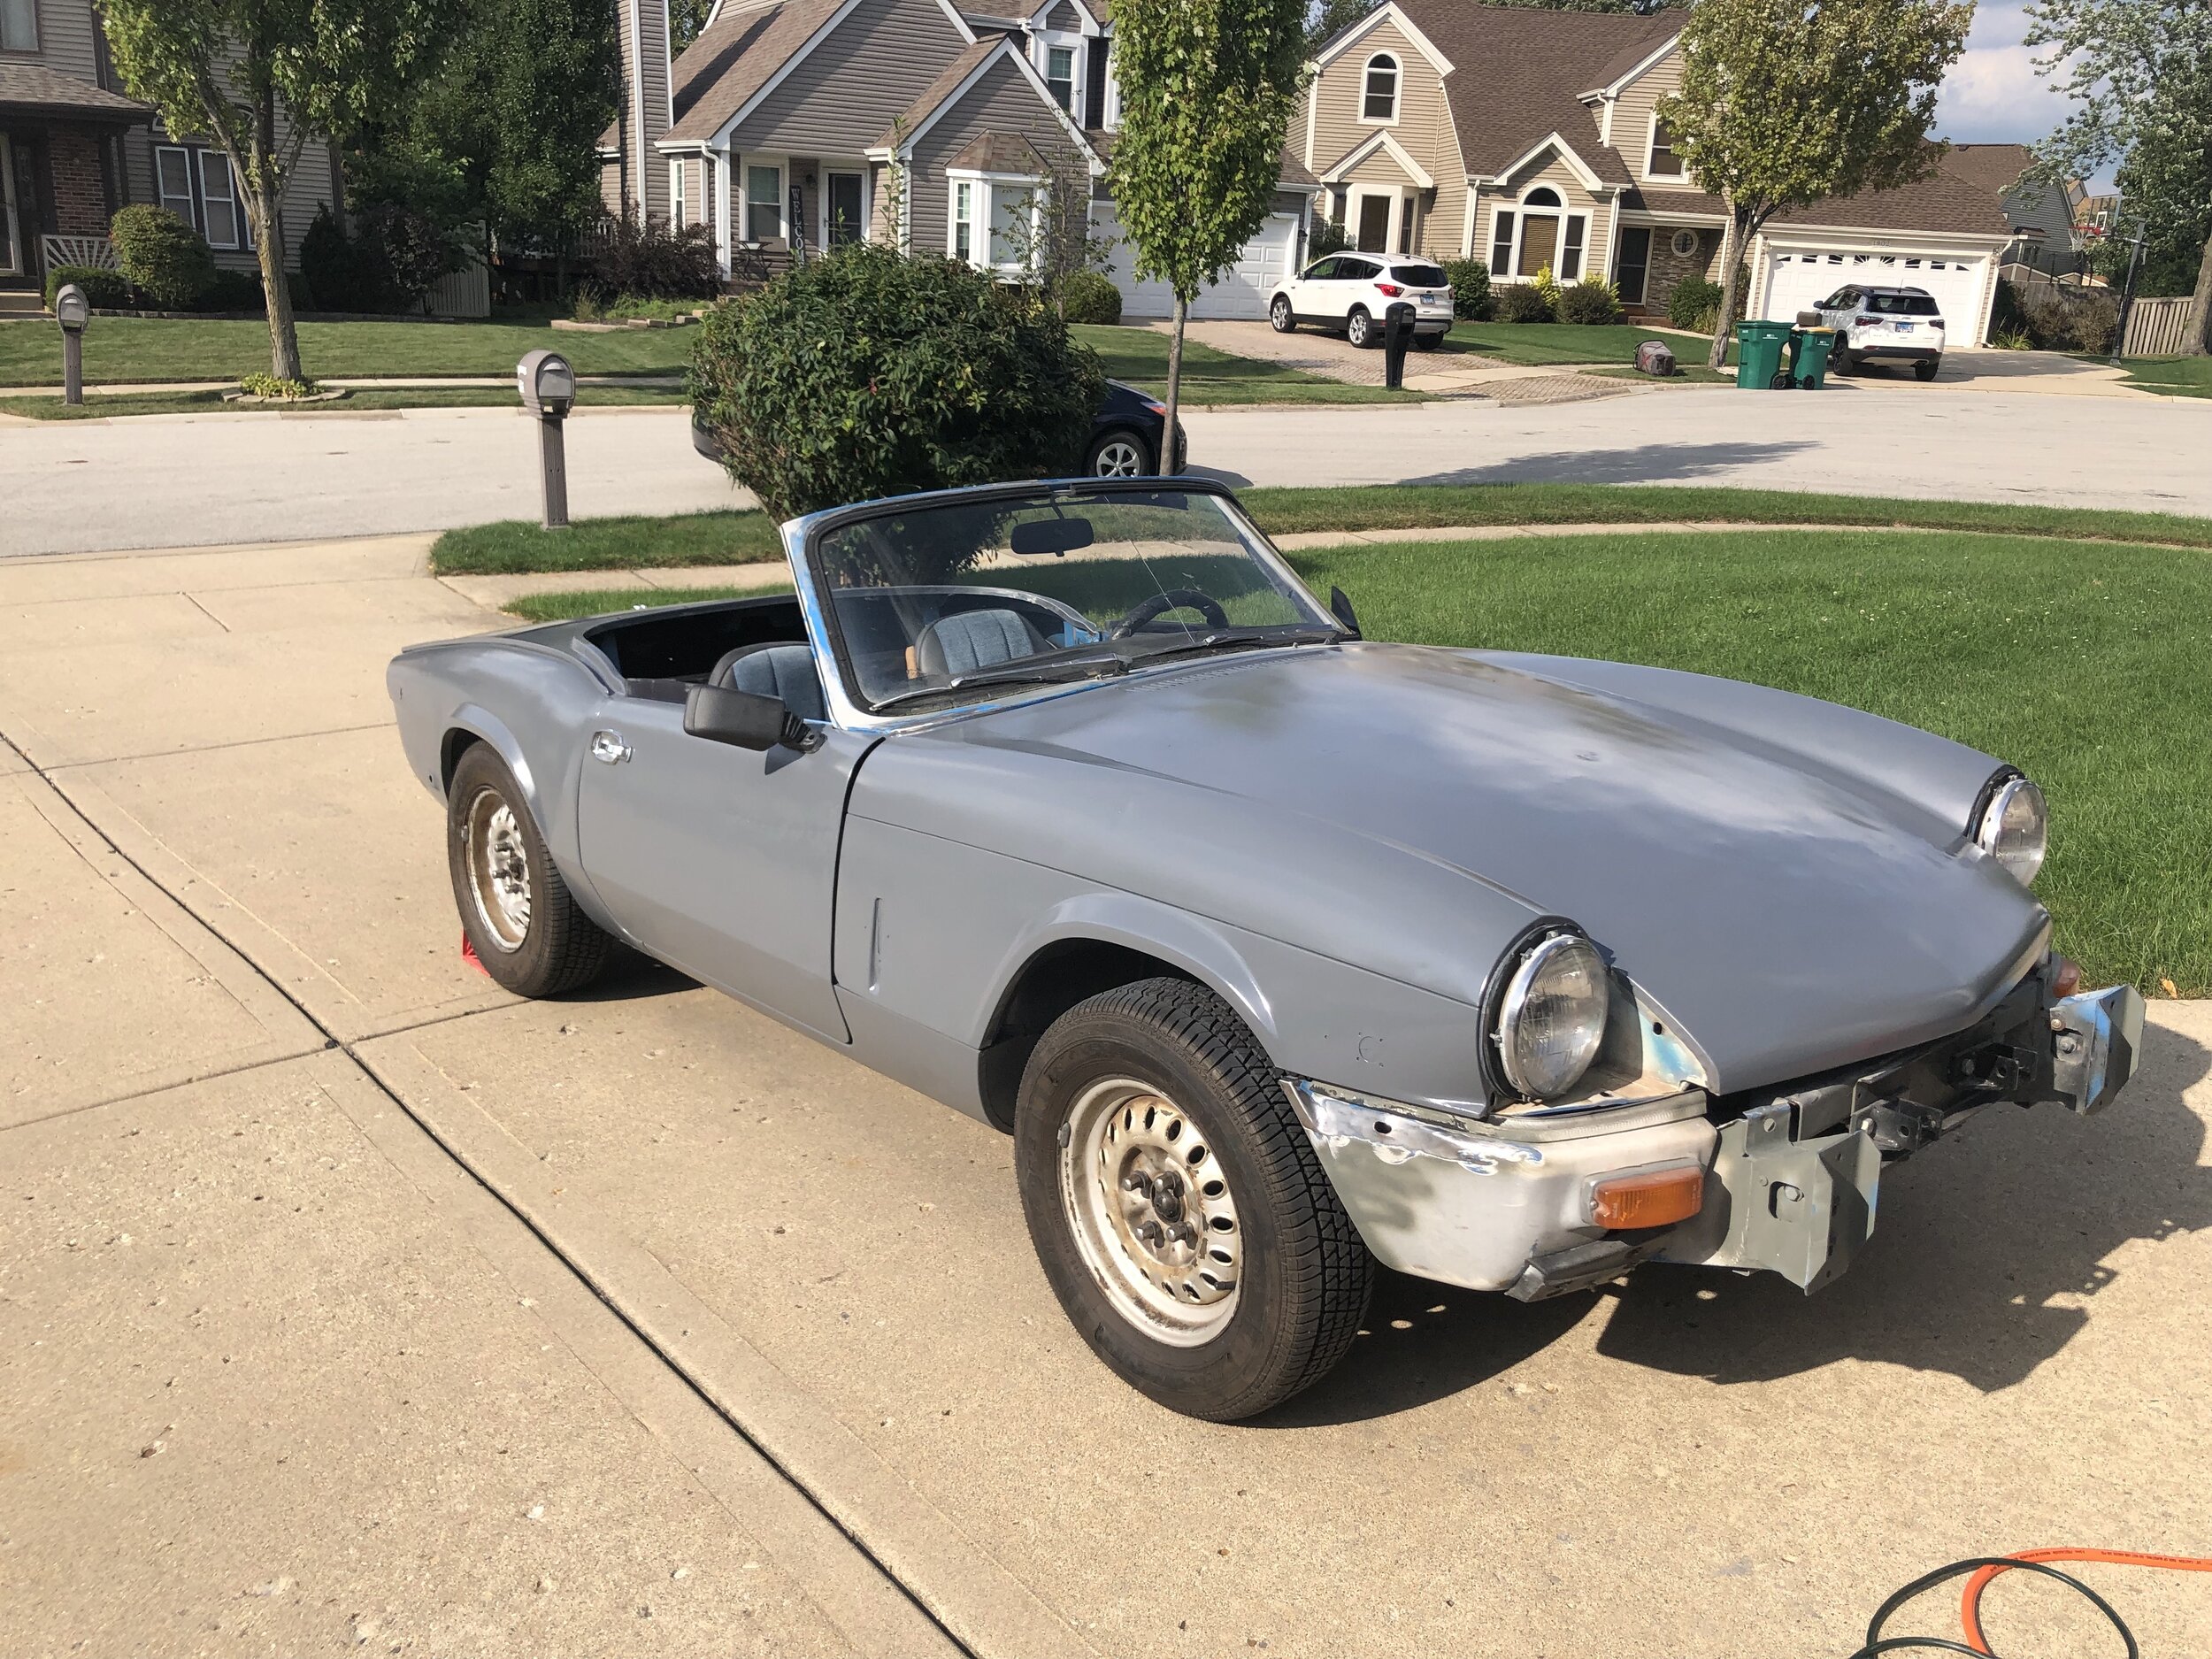
Look. Finally the car is a single color…. Almost.

Many of hours of hammer and dolly paid off.

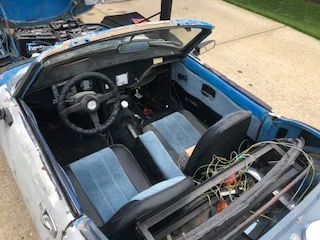
Spitfire is such a beauty. As I have only a few more spots left to finish, I am now moving to the second phase of the project. I can now shift my focus to the re-designing of the “Electrics” side of the vehicle. The real fun begins.
By the way, I have been slowly acquiring replacement parts which will be needed when I get to the final phase of the project. I think the secret to a successful restoration project is to go slow enough for you to learn things along the way and do many of the work yourself. Not only does it keep the project within budget, but the skills acquired can go a long way. Also, hunting for the original replacements parts are a major part of the fun.

I plan to install a digital screen for monitoring the ‘electric’ part of the car, but having these analog meters are just a look I can’t go without.

You won’t believe how much I paid for these rear lights. Finding these gems are definitely a part of the fun.

And up course, I had to have these original gear shift handles.
RESEARCH: Arduino Micro-Controller Board
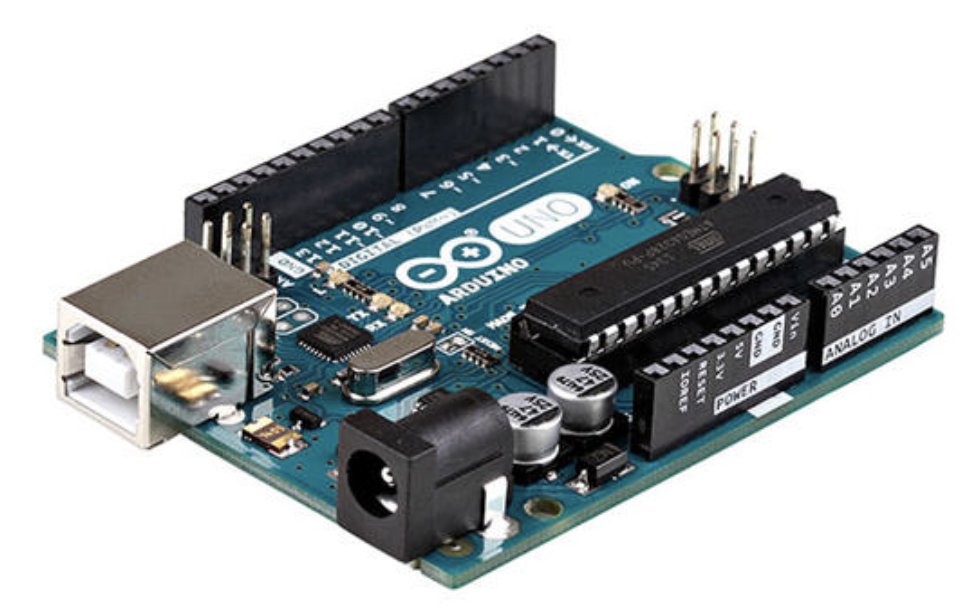
Arduino is a family of open-source microcontroller boards. These boards are equipped with digital and analog General Purpose Input/Output (GPIO) pins that can be interfaces with various electronic circuits. Arduino boards also have various expansion boards (called shields) that adds additional functionality to the Arduino boards (e.g. wifi shield). I started with the Arduino UNO around 2012 for my electronic projects. Over the years various types of Arduino boards were released as well as cheap imitation boards. One of the reasons for the popularity of the Arduino was the simple IDE (using C language) to write the program for controlling the board.
As of 2020, there are several competition that overshadowed the Arduino. Products such as ESP 8266 & 32 provide much more functionality while being much smaller and cheaper. Despite of the competitions, there are still use cases for Arduino in the maker community. Following are some of the Arduino boards that I still utilize in my projects.
Arduino UNO Rev 3 - I still love this original model from the Arduino. - additional details WIP
Arduino Mega 2560 Rev 3 - This was called a BIG brother to the UNO model with its whopping 256K RAM despite of the 8-bit processor limit. I would still argue that the use case for the Arduino supports these smaller capabilities. - additional details WIP
Arduino Nano - This is the smaller brother to the UNO. - additional details WIP
Teensy - This model is a micro USB-based development system with a small (Nano size) footprint. One of its main strong point was the smaller footprint and the larger RAM (64K). I personally never really implemented in my projects as I stayed with the Arduino UNO and Mega and jumped right over to the ESP8266 - additional details WIP
STM32F103C8 - When this model came out, it was referred to as the super-duper Arduino (referring to its 32 bit processor) or a “Small board with a really long name”. This one also, I never got around to using it in my projects, but some day, I would love to implement it in my projects to experience the limitations and advantages. - additional details WIP
Spitfire EV Project - Body work (aka Restoration) phase
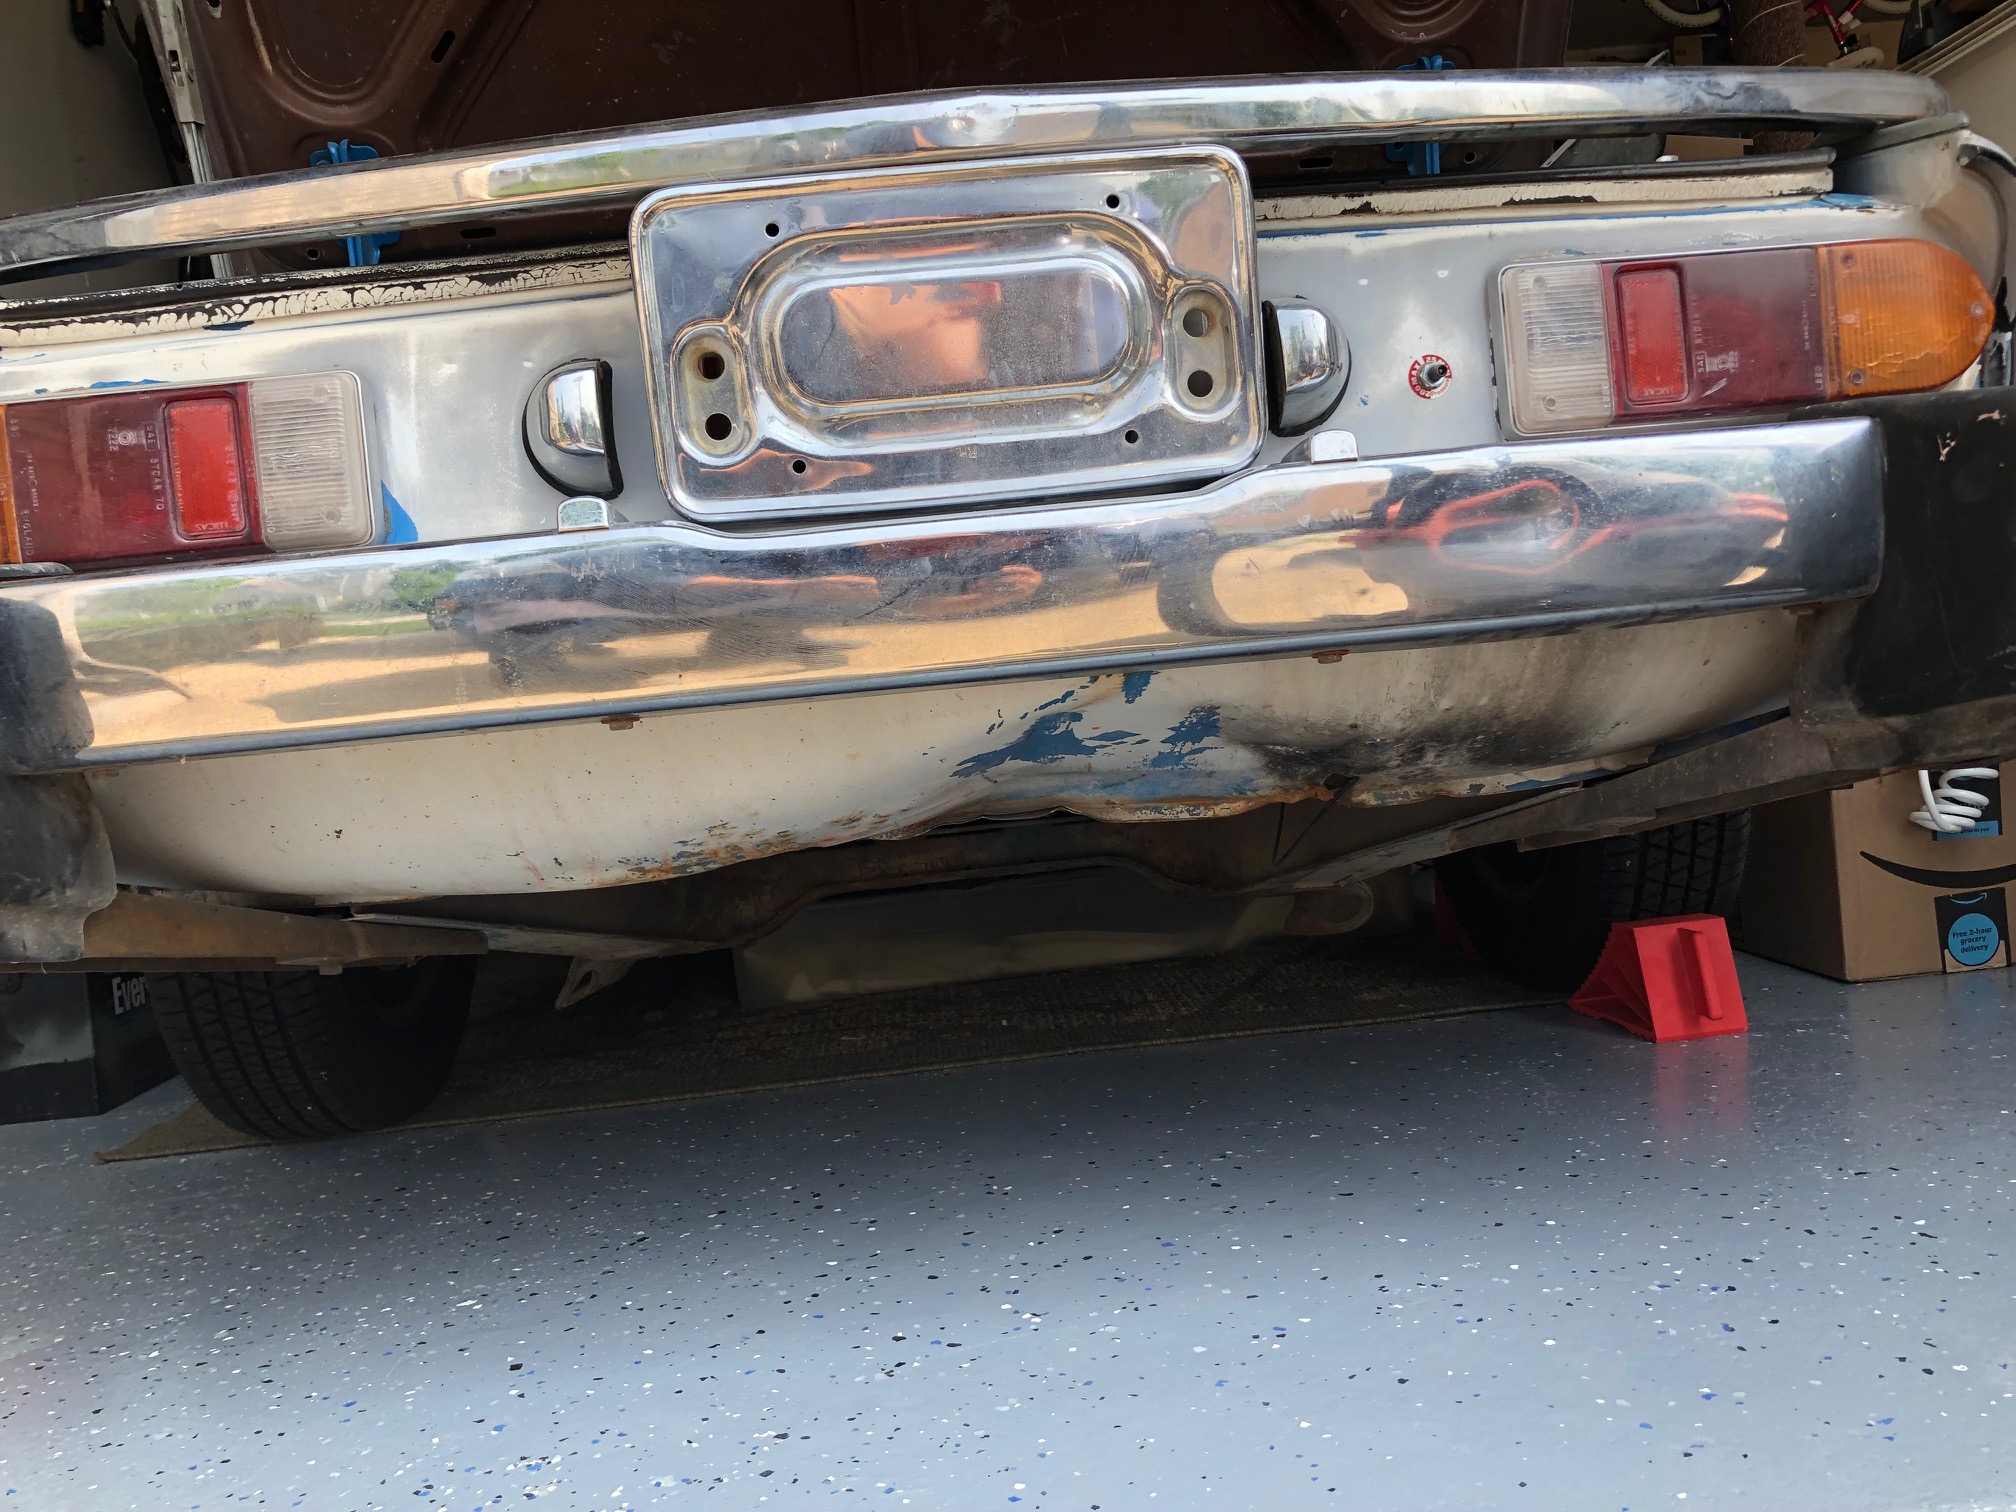
Fixing a big dent at the bottom of the trunk
As I start sanding out all the old paint from the car, one of the key task is to hammer out all the dents as best I can. Upcourse, it is much easier said than done in execution.
1/2 inch thick putty from the previous repair - all have to be scraped (aka chiseled) off!!

Lots of rust under the old putty work. Good thing I am scraping it down to the bare metal.

And more chisel work……

Since the trunk lid is doubled layered, and I am not able to get my dolly underneath and hammer it out as usual.
Time to get the stud welder out and “pull” out all the dents.
Just with everything in life, it pays off to spend the time and effort in the beginning to build a solid foundation. Since this phase is identical to the normal “Classic Auto Restoration Project”, I can go slow, learning every inch of of the car and it’s history down to the “bare” metal… and fall in love with it.
Once I get done with the body work (removing all the dents; sanding off the paint down to the bare metal; welding on all the tiny cracks formed in the body/sheet metal over time), I can spray paint the exterior with the gray color Epoxy Sealer and interior frame with the black Epoxy Sealer to protect all the metal. Once that is done (expect 1-2 months from now depending on how much time I can allocate for the project with the other competing projects), I can transition to installing batteries and working on the electronics.
Slow and steady & Keep moving forward!
1979 Triumph Spitfire is here
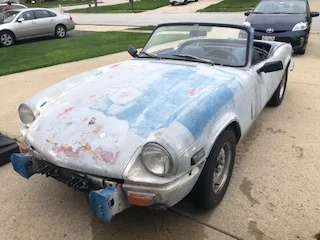
Spitfire finally came home yesterday. Thanks to Jeff and his friend for going through all the trouble to being the vehicle to me this weekend. I pulled the car out of the garage on Sunday to do some scrubbing and test the batteries. The vehicle was already converted to EV (DC motor, 6x 12v Lead Acid) back in 2010ish so this project will be Conversion Project 2.0
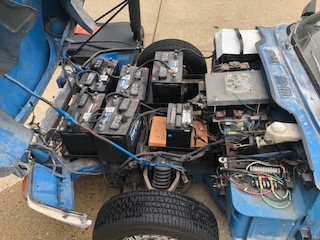
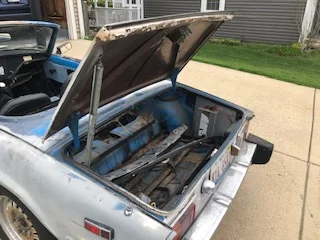
Let the sanding begin!

EV PROJECT PLAN & COST ESTIMATES
WIP - costs are being updated
EV Cost
Spitfire 1500 - $500 (inc tower)
12v Battery - TBD
Seatbelt - TBD
Windshield replace - TBD
Fuse replace - TBD
Paintwork - TBD
AC motor replace - TBD
Dashboard & meters - TBD
Supporting Cost
Garage Expoxy ($150 x3 + accessories $100 = $550)
Car cover
Tire lock x2
Panel Hammer Set ($100 inc jeweler hammer)
Dent repair hammer set
EV PROJECT VISION & GOALS
VISION
With the Tesla and other EV’s commonly seen nowadays on the street, Converted EV’s are still rare. Also, despite of all the technological advances in EV, the problem that is holding us back is still the battery. Battery is too expensive, heavy, slow charging and temperature sensitive. In order to get to know the technical limitations, I needed a platform that I can use to gain a first hand knowledge of the limitations. Also, I needed to test the different approaches in the “Battery Management” techniques and algorithms. Unlike using a modern EV full of sensors and computers that can become and obstacle during the project, a converted “classic car” can will let me focus on the EV components only. Another way to look at it is that I am building a big computerized battery testing platform that has wheels. Eventually, this project will merge with other battery & electric power projects such as battery storage (power wall) project and solar power project.
GOALS - 2018
(X) Join an Electric Vehicle club & research EV conversation process & cost
(C) Decide on a classic car, find a mechanic who can convert, and build a project plan + budget plan
GOALS - 2019 : Approach changed from paying a mechanic to convert the vehicle (faster but more costly) to doing most of the work myself (ideally buying a converted EV or In Prog)
(X) Setup garage as a workstation for EV conversation & charging
(X) Find and buy a converted vehicle & complete body work as needed
Complete necessary electric work & battery installation (Lead acid or Lithium polymer battery)
GOALS - 2020
Complete all required EV conversion work & electric safety controls
Complete car interior and dashboard (including safety belt)
Test run & optimize motor/battery configuration
Complete exterior paint & clear coat